环境及项目初始化
环境介绍
开发环境版本:
Python3.10.11、Node.js16.9.0、Vue3、MySQL5.7.31
官方文档
Node.js:https://nodejs.org/en
Vue:https://cn.vuejs.org/
Vite:https://cn.vitejs.dev/guide/
Element-Plus:https://element-plus.org/zh-CN/
FastAPI:https://fastapi.tiangolo.com/zh/
SQLAlchemy:https://docs.sqlalchemy.org/en/20/dialects/mysql.html#module-sqlalchemy.dialects.mysql.mysqldb
图片素材库:https://iconscout.com/
前端 Vue
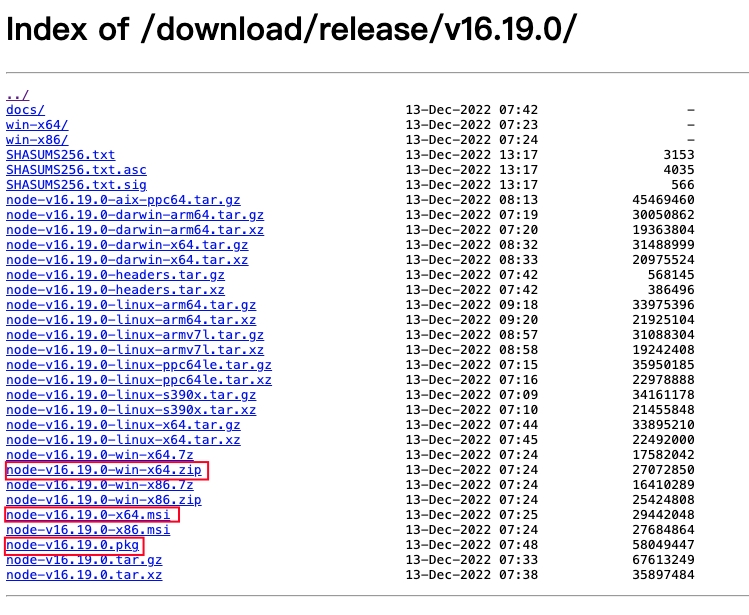
安装 Node.js
进入官网 https://nodejs.org/download/release/v16.19.0/安装好 node.js
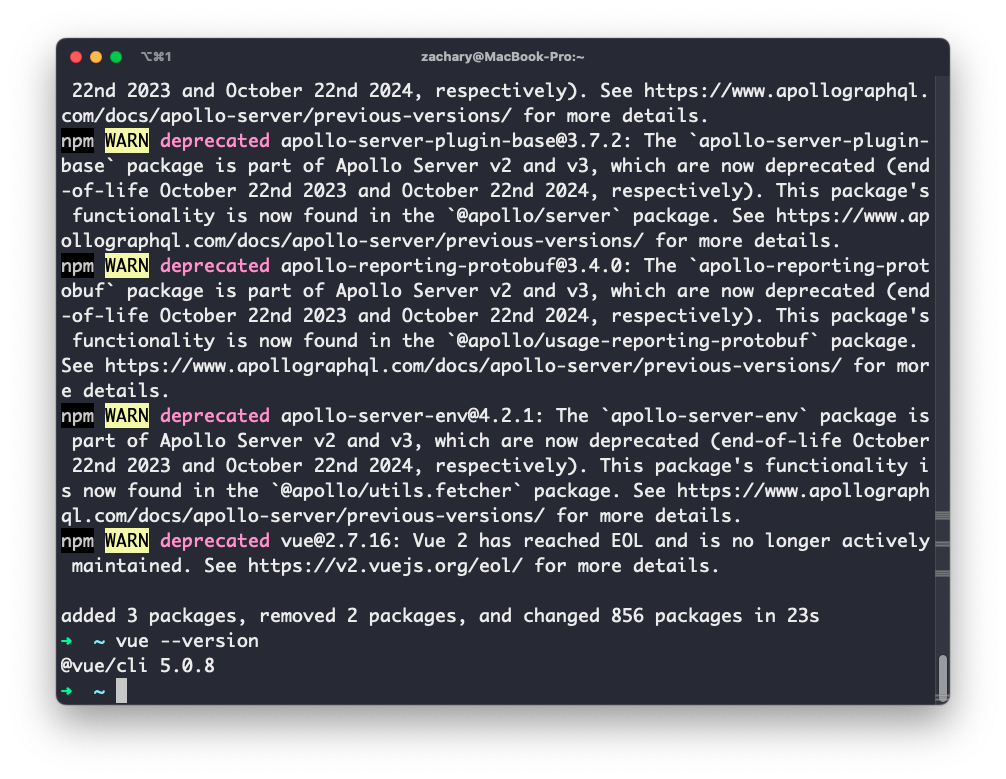
安装 vue-cli
然后使用npm install -g @vue/cli命令安装 vue-cli
创建 vue 项目
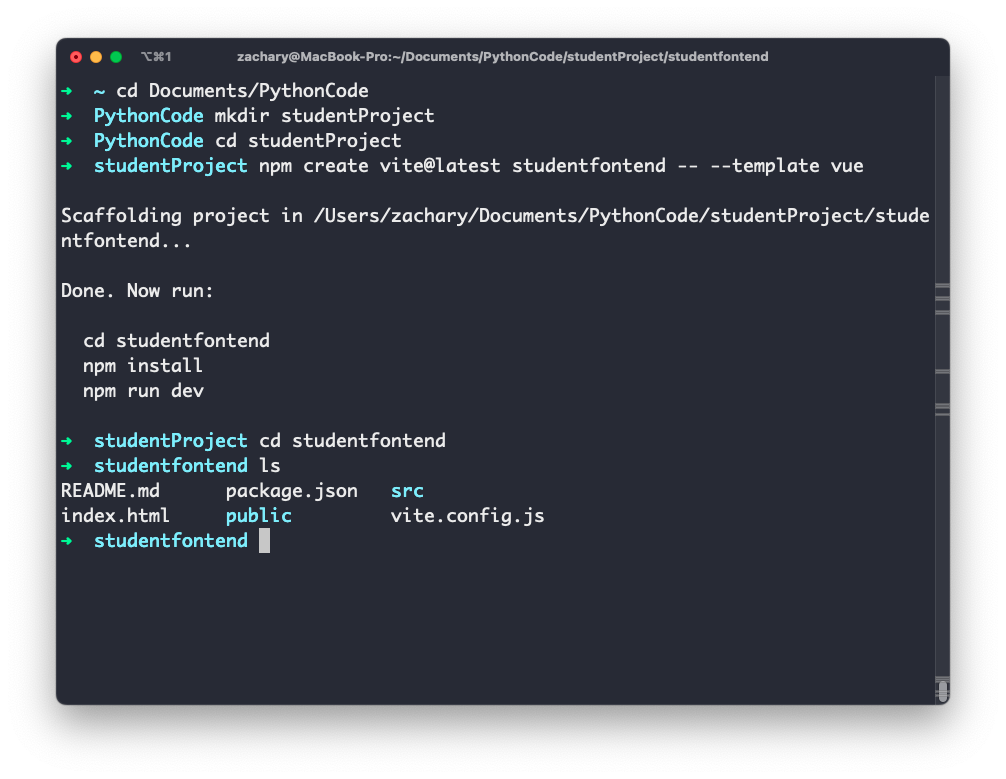
使用 vite 进行构建
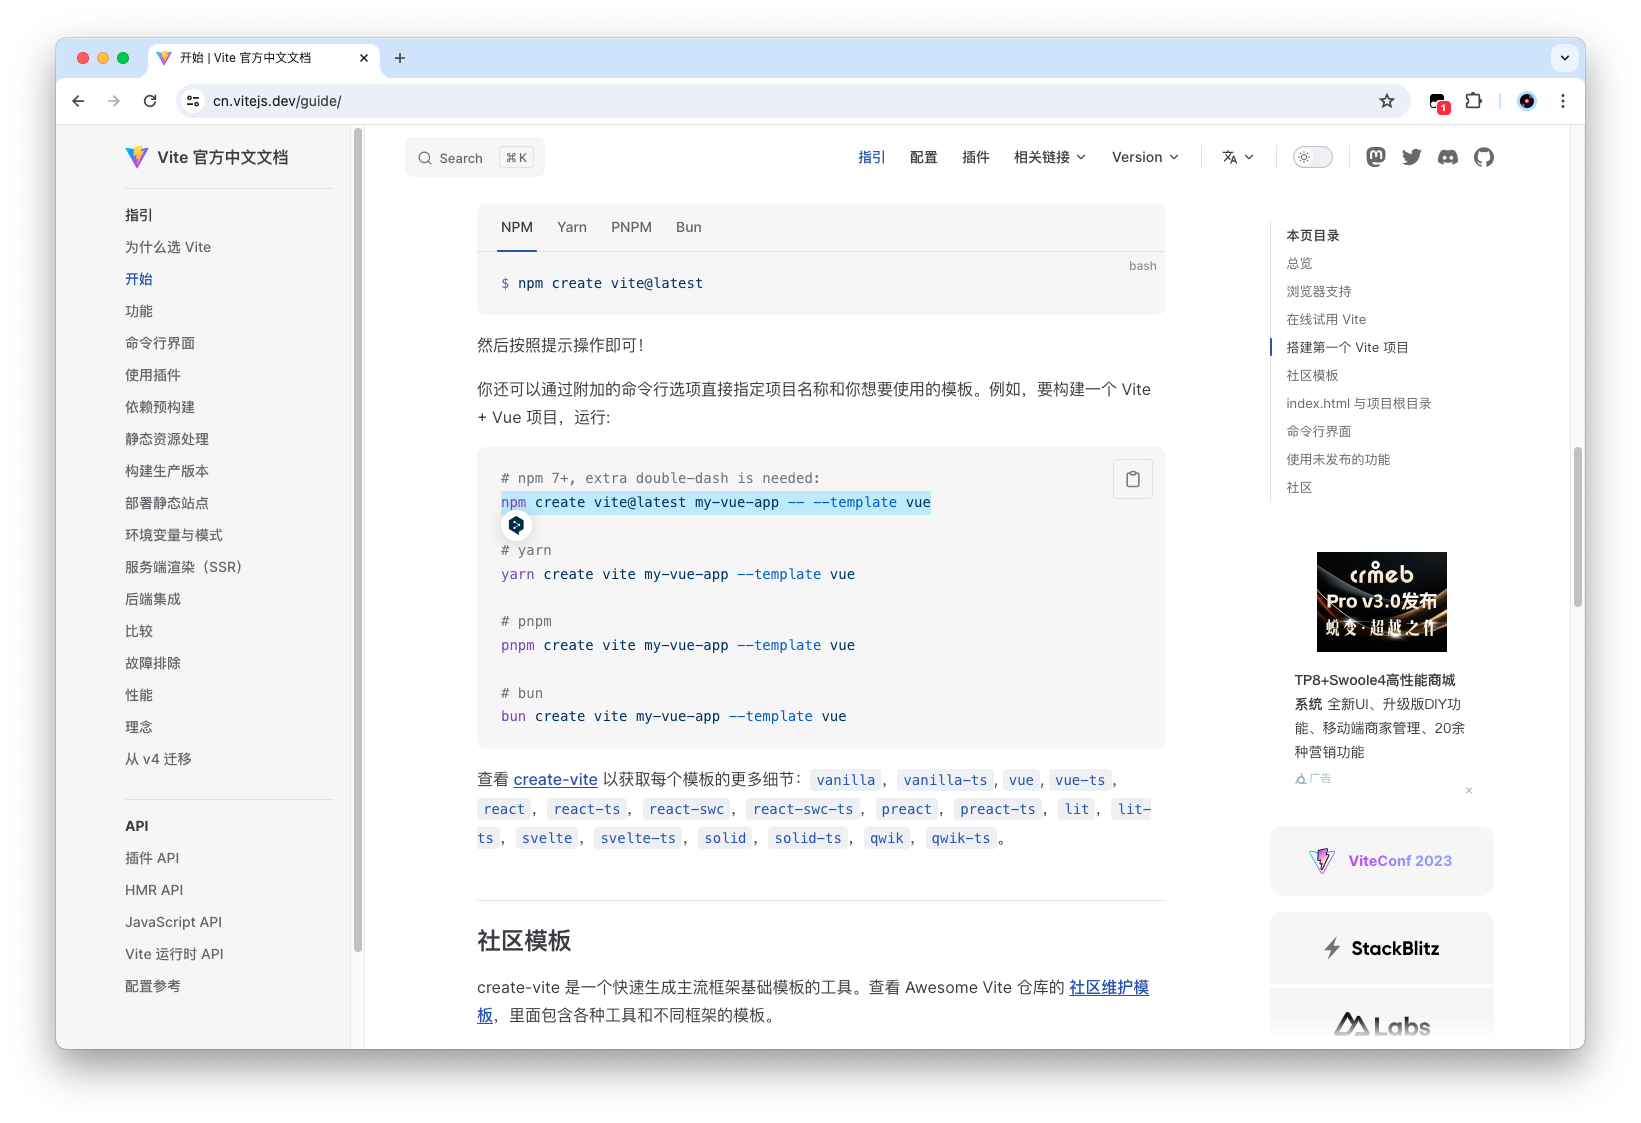
通过npm create vite@latest studentfontend -- --template vue构建前端项目
1
2
3
4
5
6
7
8
9
10
11
12
13
14
15
16
17
| ➜ ~ cd Documents/PythonCode
➜ PythonCode mkdir studentProject
➜ PythonCode cd studentProject
➜ studentProject npm create vite@latest studentfontend -- --template vue
Scaffolding project in /Users/zachary/Documents/PythonCode/studentProject/studentfontend...
Done. Now run:
cd studentfontend
npm install
npm run dev
➜ studentProject cd studentfontend
➜ studentfontend ls
README.md package.json src
index.html public vite.config.js
|
npm 源
如果 npm 命令运行的时候很卡的话,尝试换源
npm config set registry [https://registry.npmmirror.com](https://registry.npmmirror.com)
打开 vue 项目
使用 WebStorm 打开创建好的前端项目
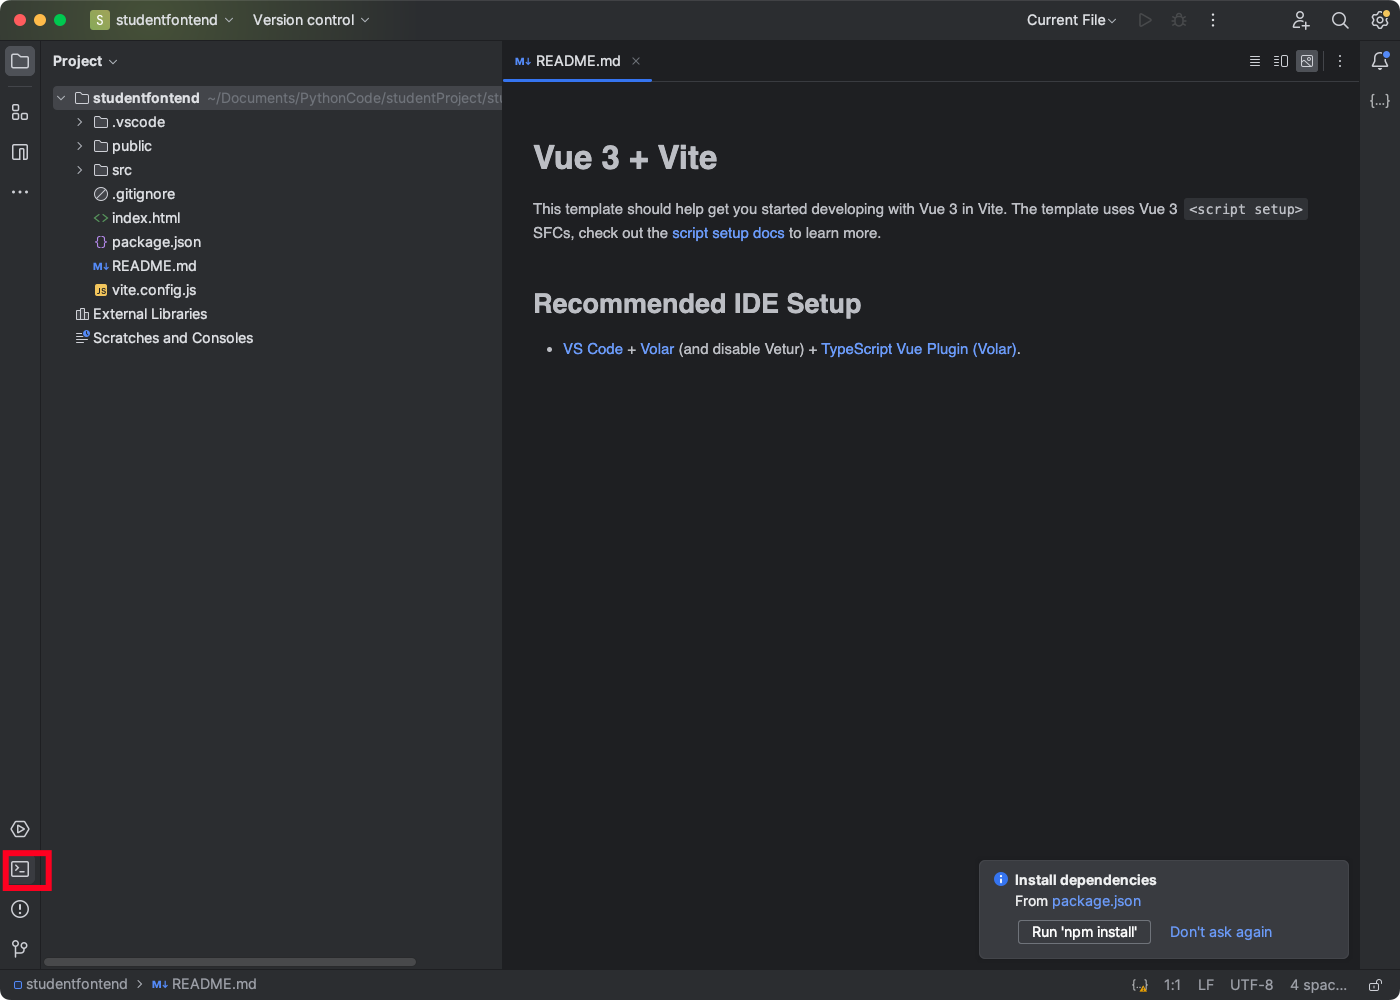
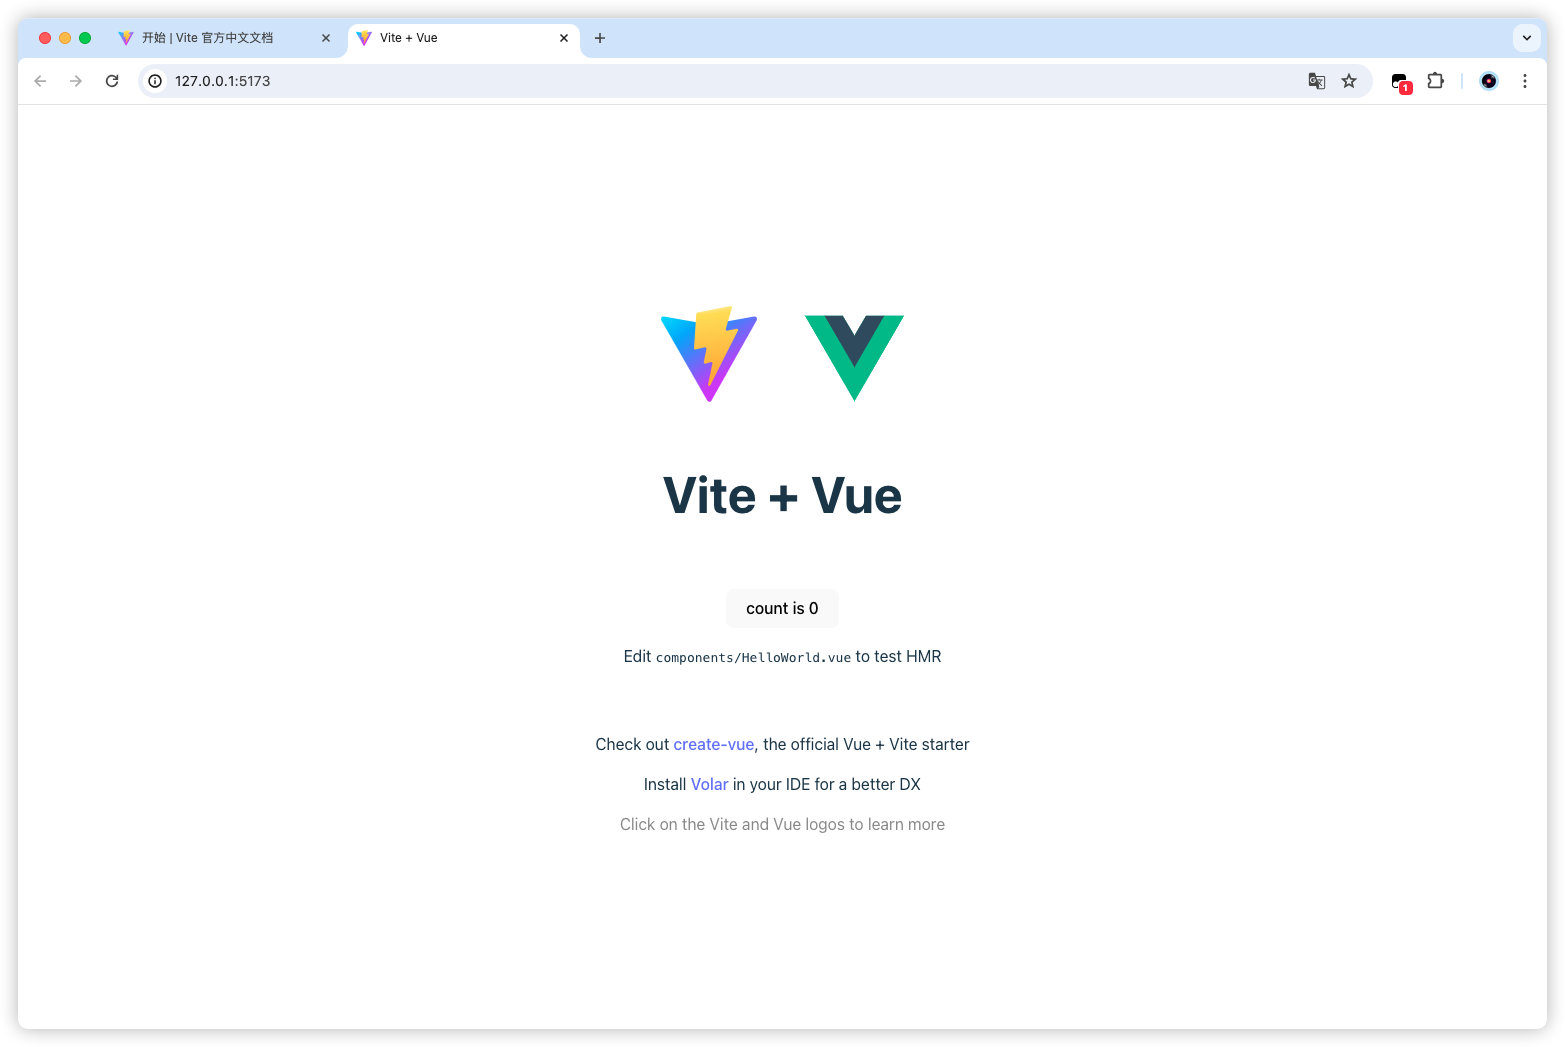
先什么都不做,尝试把项目运行起来
1
2
3
4
5
6
7
8
9
10
11
12
13
14
15
16
17
18
19
20
21
22
23
24
25
26
27
28
29
30
| ➜ studentfontend npm install
npm WARN EBADENGINE Unsupported engine {
npm WARN EBADENGINE package: '@vitejs/plugin-vue@5.0.4',
npm WARN EBADENGINE required: { node: '^18.0.0 || >=20.0.0' },
npm WARN EBADENGINE current: { node: 'v16.19.0', npm: '8.19.3' }
npm WARN EBADENGINE }
npm WARN EBADENGINE Unsupported engine {
npm WARN EBADENGINE package: 'rollup@4.12.1',
npm WARN EBADENGINE required: { node: '>=18.0.0', npm: '>=8.0.0' },
npm WARN EBADENGINE current: { node: 'v16.19.0', npm: '8.19.3' }
npm WARN EBADENGINE }
npm WARN EBADENGINE Unsupported engine {
npm WARN EBADENGINE package: 'vite@5.1.5',
npm WARN EBADENGINE required: { node: '^18.0.0 || >=20.0.0' },
npm WARN EBADENGINE current: { node: 'v16.19.0', npm: '8.19.3' }
npm WARN EBADENGINE }
up to date in 649ms
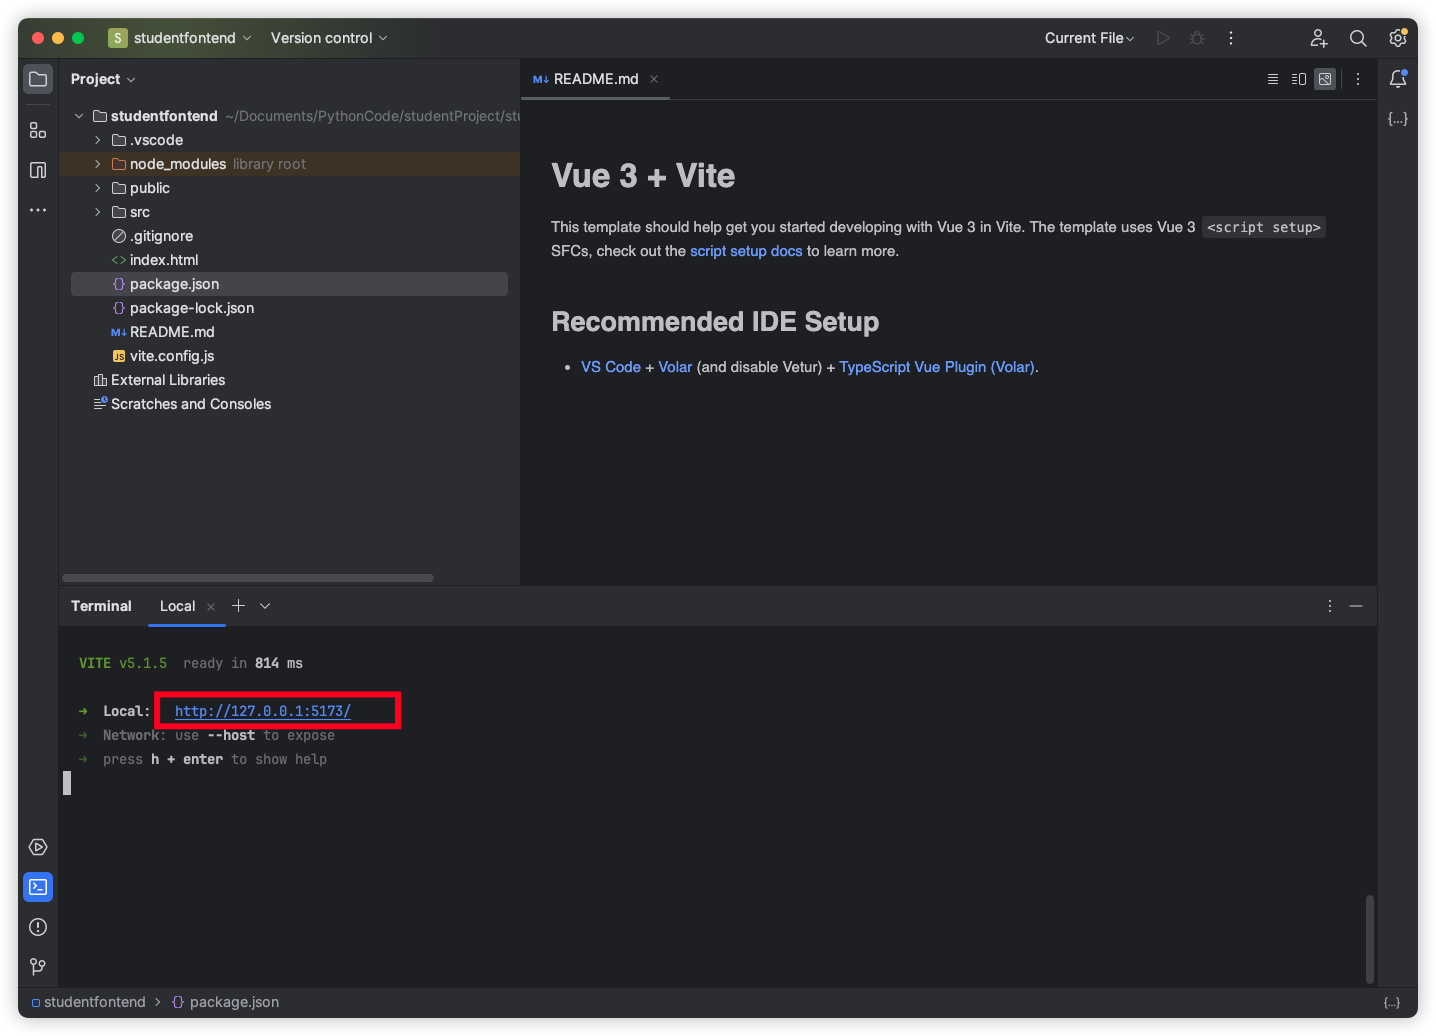
➜ studentfontend npm run dev
> studentfontend@0.0.0 dev
> vite
VITE v5.1.5 ready in 814 ms
➜ Local: http://127.0.0.1:5173/
➜ Network: use --host to expose
➜ press h + enter to show help
|
项目整改
现在我们把这个项目做好看些,为了学生信息管理系统做准备的,
需要把路由写好,同时修改主题色,还有 request http 的请求封装,选择一个自己喜欢的页面标题及 icon
index.html
修改项目下的 index.html 文件
1
2
3
4
5
6
7
8
9
10
11
12
13
| <!DOCTYPE html>
<html lang="en">
<head>
<meta charset="UTF-8" />
<link rel="icon" href="/favicon.ico" />
<meta name="viewport" content="width=device-width, initial-scale=1.0" />
<title>学生信息管理系统</title>
</head>
<body>
<div id="app"></div>
<script type="module" src="/src/main.js"></script>
</body>
</html>
|
css&imgs
删除/assets下的vue.svg
在/src/assets路径下创建一个css和imgs目录
在创建好的/css目录下分别创建global.css和index.scss
全局 css 样式
1
2
3
4
5
6
7
8
9
10
11
12
13
14
15
16
17
18
19
20
| * {
box-sizing: border-box;
}
body {
margin: 0;
padding: 0;
color: #252424;
}
a {
text-decoration: none;
}
.card {
background-color: rgb(255, 255, 255);
border-radius: 5px;
padding: 10px;
box-shadow: 0 0 10px rgba(0, 0, 0, 0.1);
}
|
主题色配置文件
1
2
3
4
5
6
7
8
9
10
11
12
13
14
15
16
17
18
19
| @forward "element-plus/theme-chalk/src/common/var.scss" with (
$colors: (
"primary": (
"base": #0a7fce
),
"success": (
"base": #08b41f
),
"warning": (
"base": #e8af56
),
"danger": (
"base": #ef3030
),
"info": (
"base": #5d66ea
)
)
);
|
路由设置
在/src路径下创建一个router目录,在其中创建一个index.js文件
1
2
3
4
5
6
7
8
9
10
11
12
13
14
15
16
17
18
19
20
21
22
| import { createRouter, createWebHistory } from "vue-router";
const router = createRouter({
history: createWebHistory(import.meta.env.BASE_URL),
routes: [
{
path: "/",
name: "Manager",
component: () => import("@/views/Manager.vue"),
redirect: "/home",
children: [
{
path: "home",
name: "Home",
component: () => import("@/views/manager/Home.vue"),
},
],
},
],
});
export default router;
|
request 请求
/src路径下创建一个utils目录,在其中创建一个request.js文件
1
2
3
4
5
6
7
8
9
10
11
12
13
14
15
16
17
18
19
20
21
22
23
24
25
26
27
28
29
30
31
32
33
34
35
36
37
38
39
40
41
42
43
44
45
46
47
48
| import { ElMessage } from "element-plus";
import router from "../router";
import axios from "axios";
const request = axios.create({
baseURL: import.meta.env.VITE_BASE_URL,
timeout: 30000,
});
request.interceptors.request.use(
(config) => {
config.headers["Content-Type"] = "application/json;charset=utf-8";
return config;
},
(error) => {
return Promise.reject(error);
}
);
request.interceptors.response.use(
(response) => {
let res = response.data;
if (response.config.responseType === "blob") {
return res;
}
if (typeof res === "string") {
res = res ? JSON.parse(res) : res;
}
if (res.code === "401") {
ElMessage.error(res.msg);
router.push("/login");
}
return res;
},
(error) => {
console.log("err" + error);
return Promise.reject(error);
}
);
export default request;
|
views
/src路径下的/components修改为/views目录,将其中的HelloWorld.vue修改成Manager.vue
1
2
3
4
5
6
7
8
9
10
11
12
13
14
15
16
17
18
19
20
21
22
23
24
25
26
27
28
29
30
31
32
33
34
35
36
37
38
39
40
41
42
43
44
45
46
47
48
49
50
51
52
53
54
55
56
57
58
59
60
61
62
63
64
65
66
67
68
69
70
71
72
73
74
75
76
77
78
| <template>
<div>
<div
style="height: 60px; background-color: #eae8e8; display: flex; align-items: center; border-bottom: 1px solid #c4c2c2"
>
<div style="flex: 1">
<div style="padding-left: 20px; display: flex; align-items: center">
<img src="@/assets/imgs/logo.png" alt="" style="width: 40px" />
<div style="font-weight: bold; font-size: 24px; margin-left: 5px">
学生信息管理系统
</div>
</div>
</div>
<div
style="width: fit-content; padding-right: 10px; display: flex; align-items: center;"
>
<img
src="https://cube.elemecdn.com/3/7c/3ea6beec64369c2642b92c6726f1epng.png"
alt=""
style="width: 40px; height: 40px"
/>
<span style="margin-left: 5px">管理员</span>
</div>
</div>
<div style="display: flex">
<div
style="width: 200px; border-right: 1px solid #f3eeee; min-height: calc(100vh - 60px)"
>
<el-menu
router
style="border: none"
:default-active="$route.path"
:default-openeds="['/home']"
>
<el-menu-item index="/home">
<el-icon><HomeFilled /></el-icon>
<span>系统首页</span>
</el-menu-item>
<el-menu-item index="/person">
<el-icon><User /></el-icon>
<span>个人资料</span>
</el-menu-item>
<el-menu-item index="login" @click="logout">
<el-icon><SwitchButton /></el-icon>
<span>退出系统</span>
</el-menu-item>
</el-menu>
</div>
<div style="flex: 1; width: 0; background-color: #eaeaee; padding: 10px">
<router-view />
</div>
</div>
</div>
</template>
<script setup>
import { useRoute } from "vue-router";
const $route = useRoute();
console.log($route.path);
const logout = () => {
localStorage.removeItem("student-user");
};
</script>
<style scoped>
.el-menu-item.is-active {
background-color: #c3d7d3 !important;
}
.el-menu-item:hover {
color: #0c98d5;
}
:deep(th) {
color: #333;
}
</style>
|
接着在/src/views路径下创建一个manager目录,在其中创建一个Home.vue文件
1
2
3
4
5
6
7
8
9
10
11
12
13
14
15
16
17
18
19
20
21
22
23
24
25
26
27
28
29
30
31
| <template>
<div class="welcome-container">
<div class="custom-card bg-white shadow rounded p-4 mb-5">
<h2 class="text-center text-primary">欢迎来到本系统</h2>
<p class="text-center mt-3">
您好 <span :style="{ color: '#116ca9' }">{{ user.username }}</span
>,祝您使用愉快!
</p>
</div>
</div>
</template>
<script setup>
import request from "@/utils/request";
const user = JSON.parse(localStorage.getItem("student-user") || "{}");
</script>
<style scoped>
.welcome-container {
display: flex;
justify-content: center;
align-items: center;
min-height: calc(100vh - 100px); /* 根据实际项目需要调整高度 */
}
.custom-card {
max-width: 400px;
border: none;
}
</style>
|
App.vue
修改项目中的/src/App.vue
1
2
3
| <template>
<RouterView />
</template>
|
main.js
修改项目中的/src/main.js
1
2
3
4
5
6
7
8
9
10
11
12
13
14
15
16
17
18
19
20
| import { createApp } from "vue";
import App from "./App.vue";
import router from "./router";
import ElementPlus from "element-plus";
import zhCn from "element-plus/dist/locale/zh-cn.mjs";
import * as ElementPlusIconsVue from "@element-plus/icons-vue";
import "@/assets/css/global.css";
const app = createApp(App);
app.use(router);
app.use(ElementPlus, {
locale: zhCn,
});
app.mount("#app");
for (const [key, component] of Object.entries(ElementPlusIconsVue)) {
app.component(key, component);
}
|
.env
在项目路径下创建两个文件.env.development、.env.production
1
| VITE_BASE_URL='http://localhost:9090'
|
1
| VITE_BASE_URL='http://:9090'
|
json 配置
修改项目路径下的文件:package.json
1
2
3
4
5
6
7
8
9
10
11
12
13
14
15
16
17
18
19
20
21
22
23
24
25
| {
"name": "studentfontend",
"version": "0.0.0",
"private": true,
"scripts": {
"dev": "vite",
"build": "vite build",
"preview": "vite preview"
},
"dependencies": {
"@element-plus/icons-vue": "^2.1.0",
"axios": "^1.6.2",
"element-plus": "^2.4.2",
"sass": "^1.69.5",
"unplugin-element-plus": "^0.8.0",
"vue": "^3.3.4",
"vue-router": "^4.2.5"
},
"devDependencies": {
"@vitejs/plugin-vue": "^4.4.0",
"unplugin-auto-import": "^0.16.7",
"unplugin-vue-components": "^0.25.2",
"vite": "^4.4.11"
}
}
|
vite.config.js
修改项目路径下的文件:vite.config.js
1
2
3
4
5
6
7
8
9
10
11
12
13
14
15
16
17
18
19
20
21
22
23
24
25
26
27
28
29
30
31
32
33
34
35
36
37
38
39
40
| import { fileURLToPath, URL } from "node:url";
import { defineConfig } from "vite";
import vue from "@vitejs/plugin-vue";
import AutoImport from "unplugin-auto-import/vite";
import Components from "unplugin-vue-components/vite";
import { ElementPlusResolver } from "unplugin-vue-components/resolvers";
import ElementPlus from "unplugin-element-plus/vite";
export default defineConfig({
plugins: [
vue(),
AutoImport({
resolvers: [ElementPlusResolver({ importStyle: "sass" })],
}),
Components({
resolvers: [ElementPlusResolver({ importStyle: "sass" })],
}),
ElementPlus({
useSource: true,
}),
],
resolve: {
alias: {
"@": fileURLToPath(new URL("./src", import.meta.url)),
},
},
css: {
preprocessorOptions: {
scss: {
additionalData: `
@use "@/assets/css/index.scss" as *;
`,
},
},
},
});
|
logo
修改一下 logo 和标题的 icon
分别放在/public/favicon.ico和/src/assets/imgs/logo.png路径下
删除/public/vite.svg
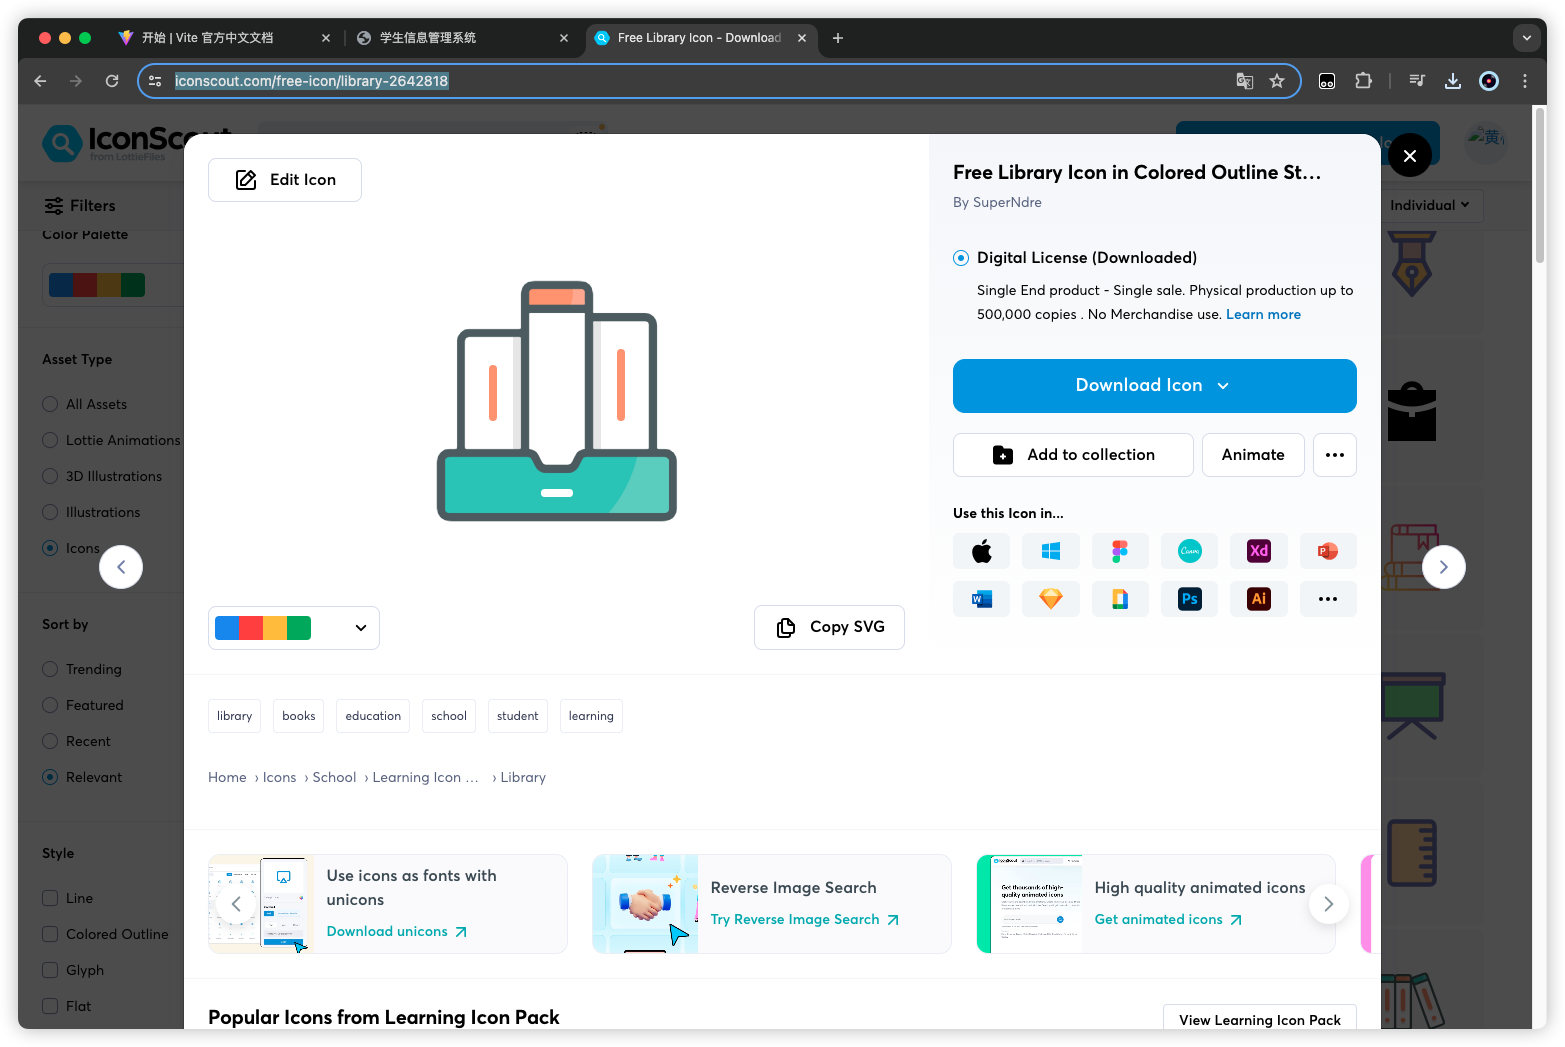
可以去这个网站下载https://iconscout.com/icons
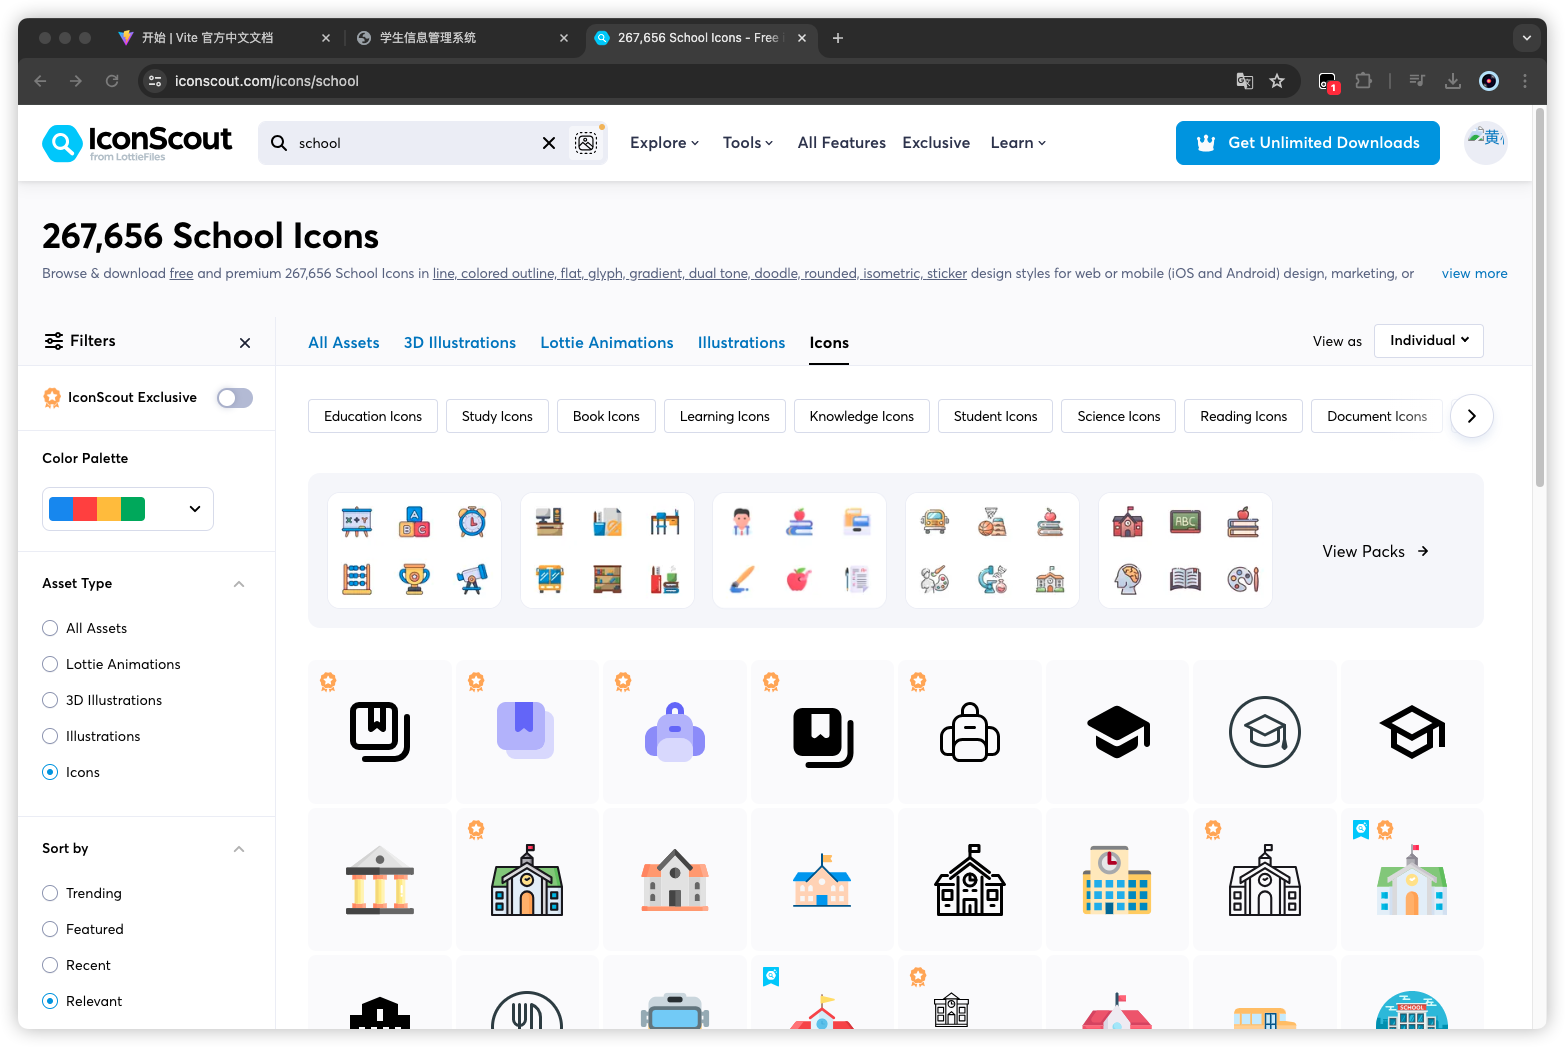
https://iconscout.com/free-icon/library-2642818,将该图片保存为/src/assets/imgs/logo.png
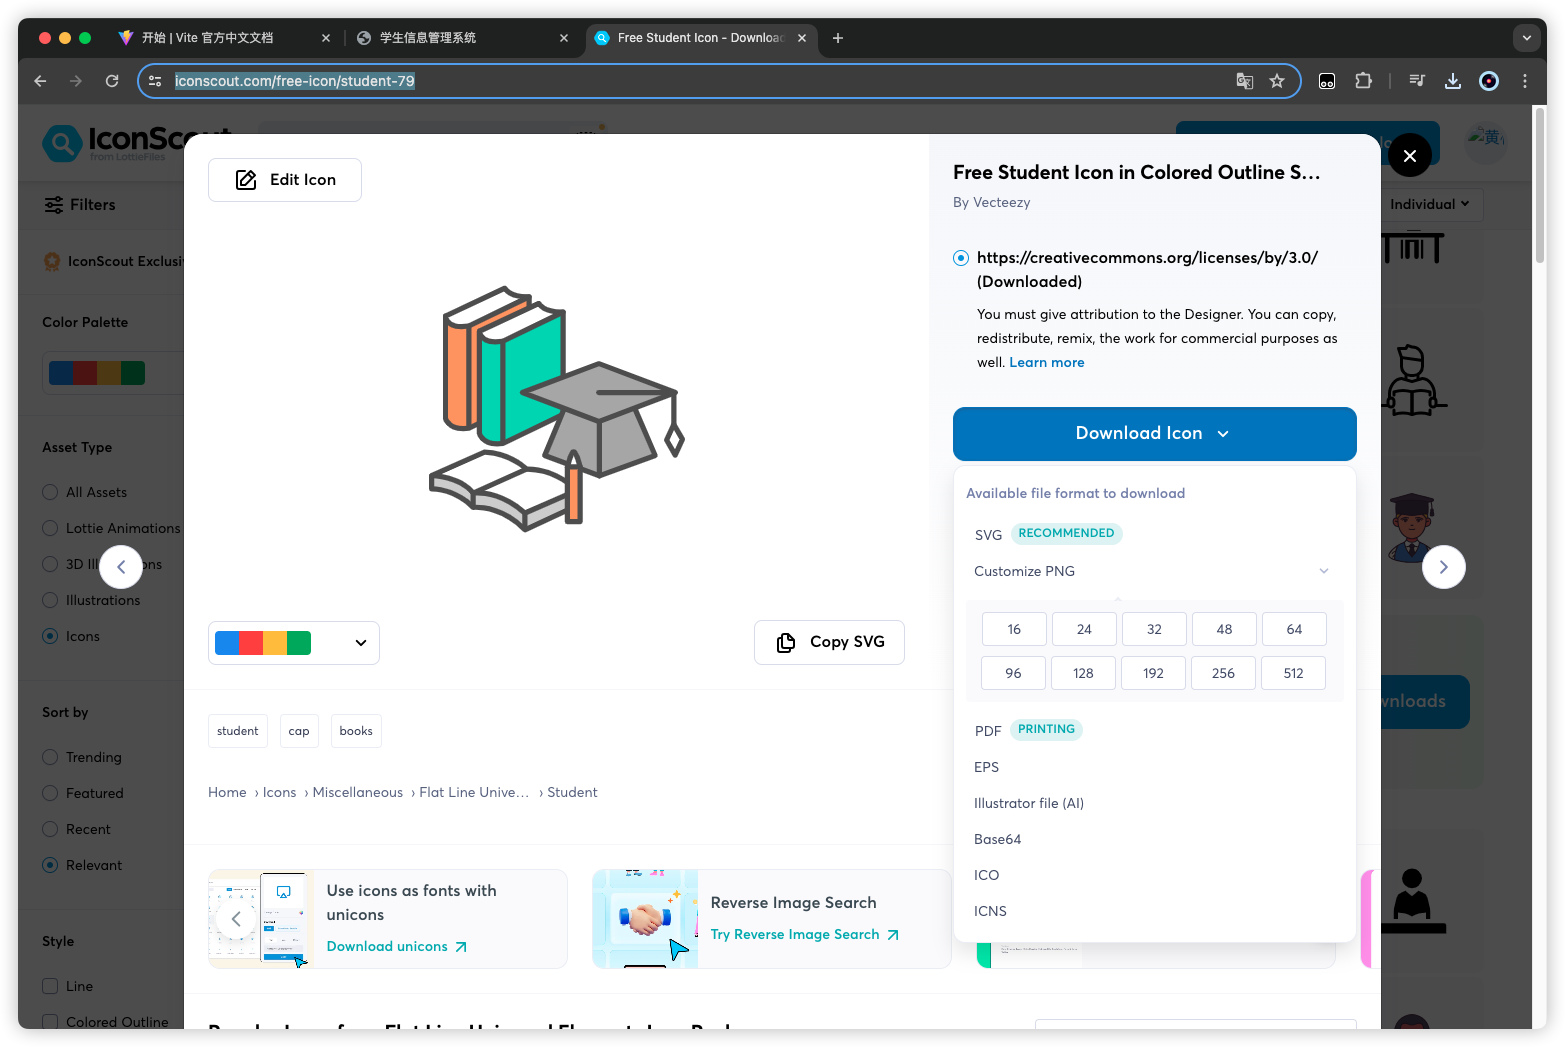
或者https://iconscout.com/free-icon/student-79
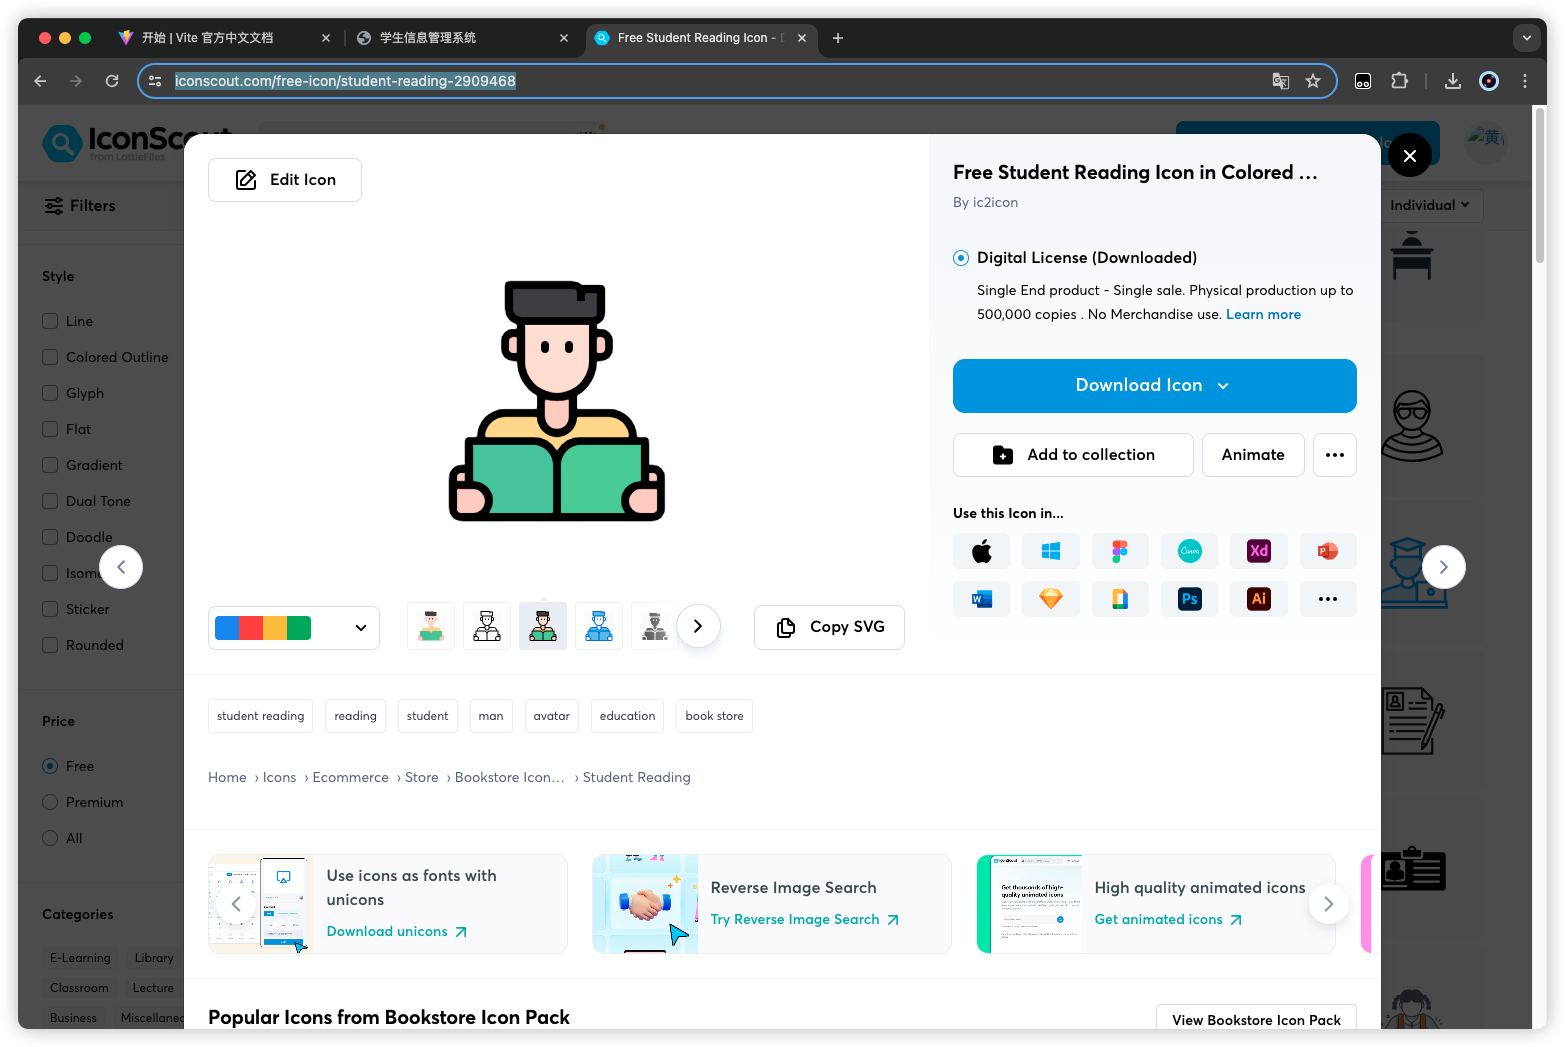
https://iconscout.com/free-icon/student-reading-2909468,保存为/public/favicon.ico
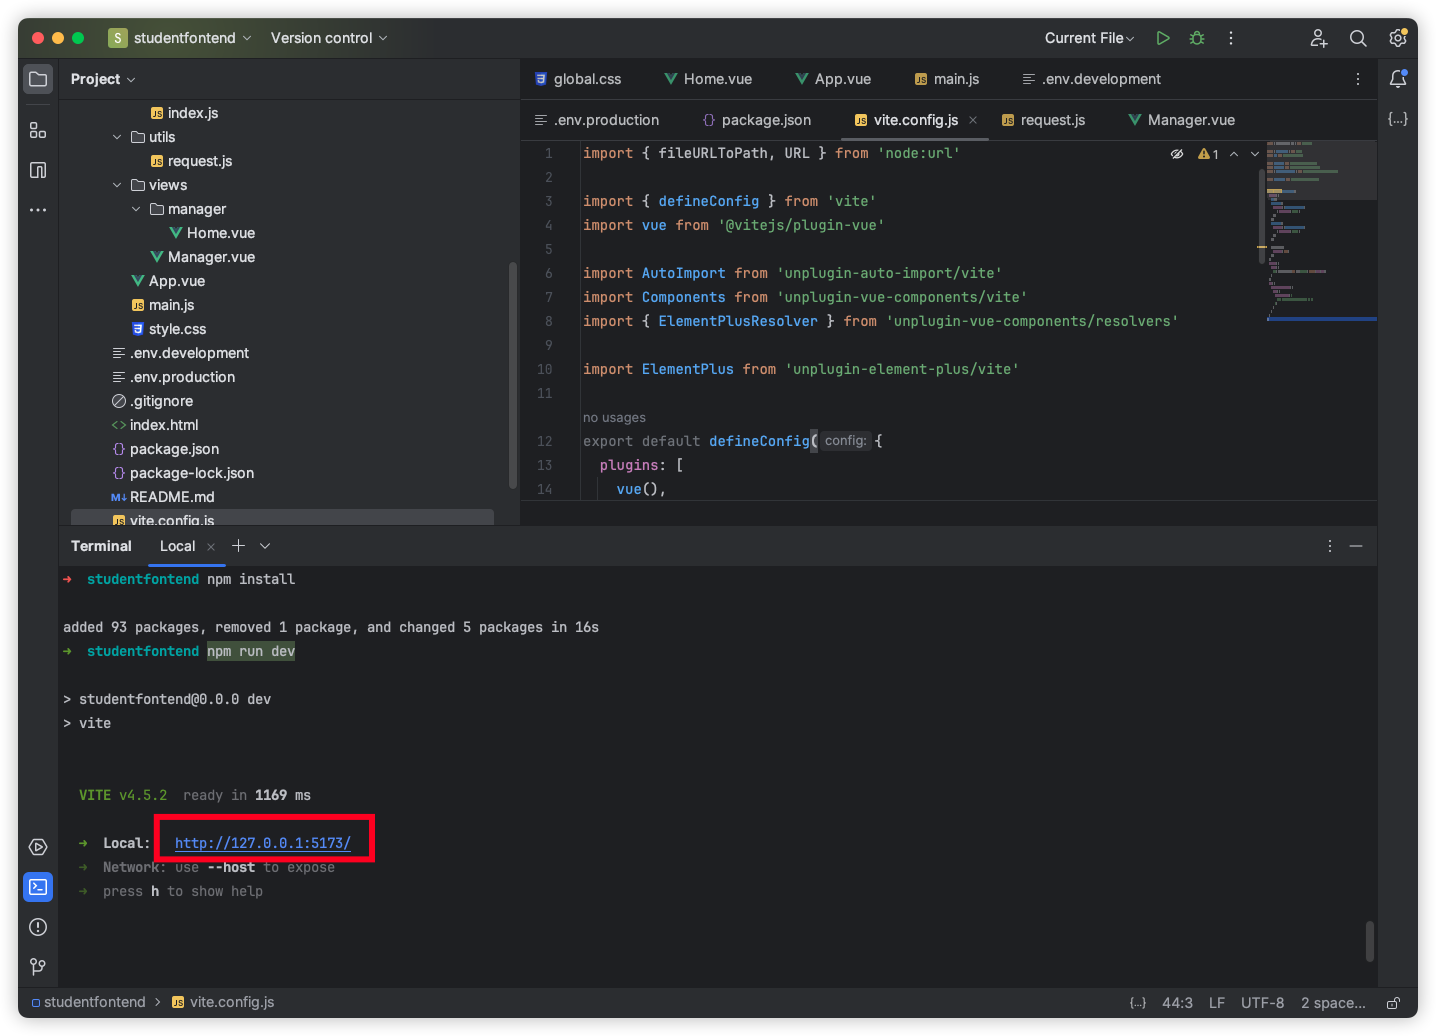
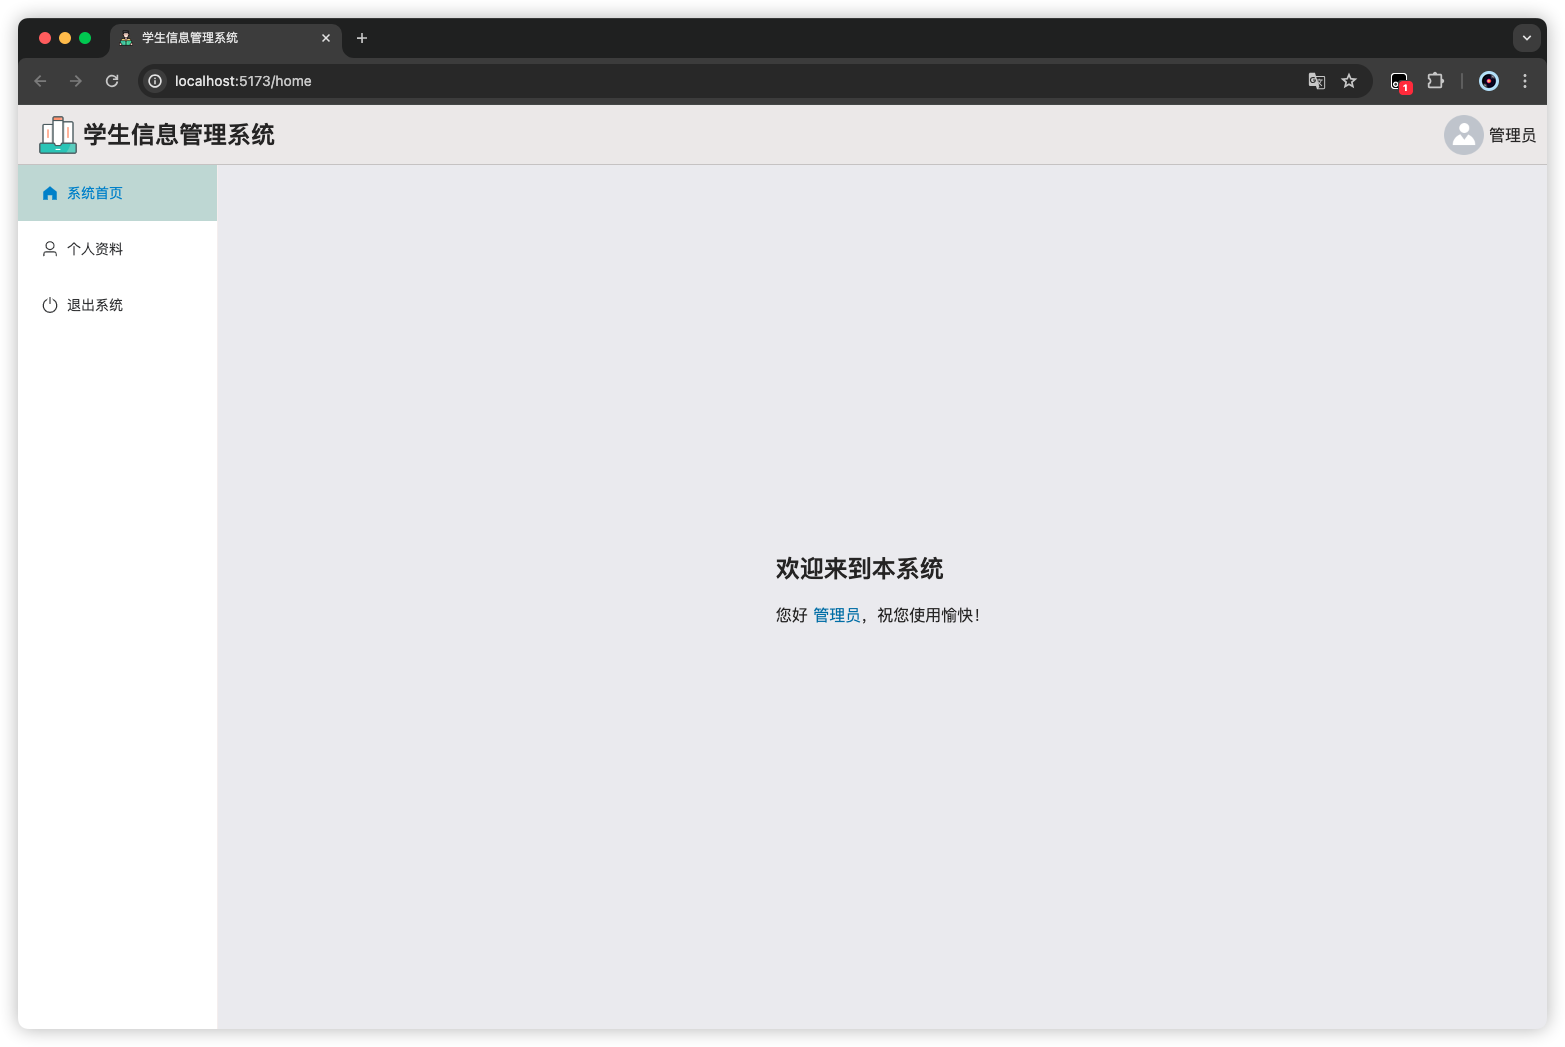
运行
命令运行
1
2
3
4
5
6
7
8
9
10
11
12
13
14
| ➜ studentfontend npm install
added 93 packages, removed 1 package, and changed 5 packages in 16s
➜ studentfontend npm run dev
> studentfontend@0.0.0 dev
> vite
VITE v4.5.2 ready in 1169 ms
➜ Local: http://127.0.0.1:5173/
➜ Network: use --host to expose
➜ press h to show help
|
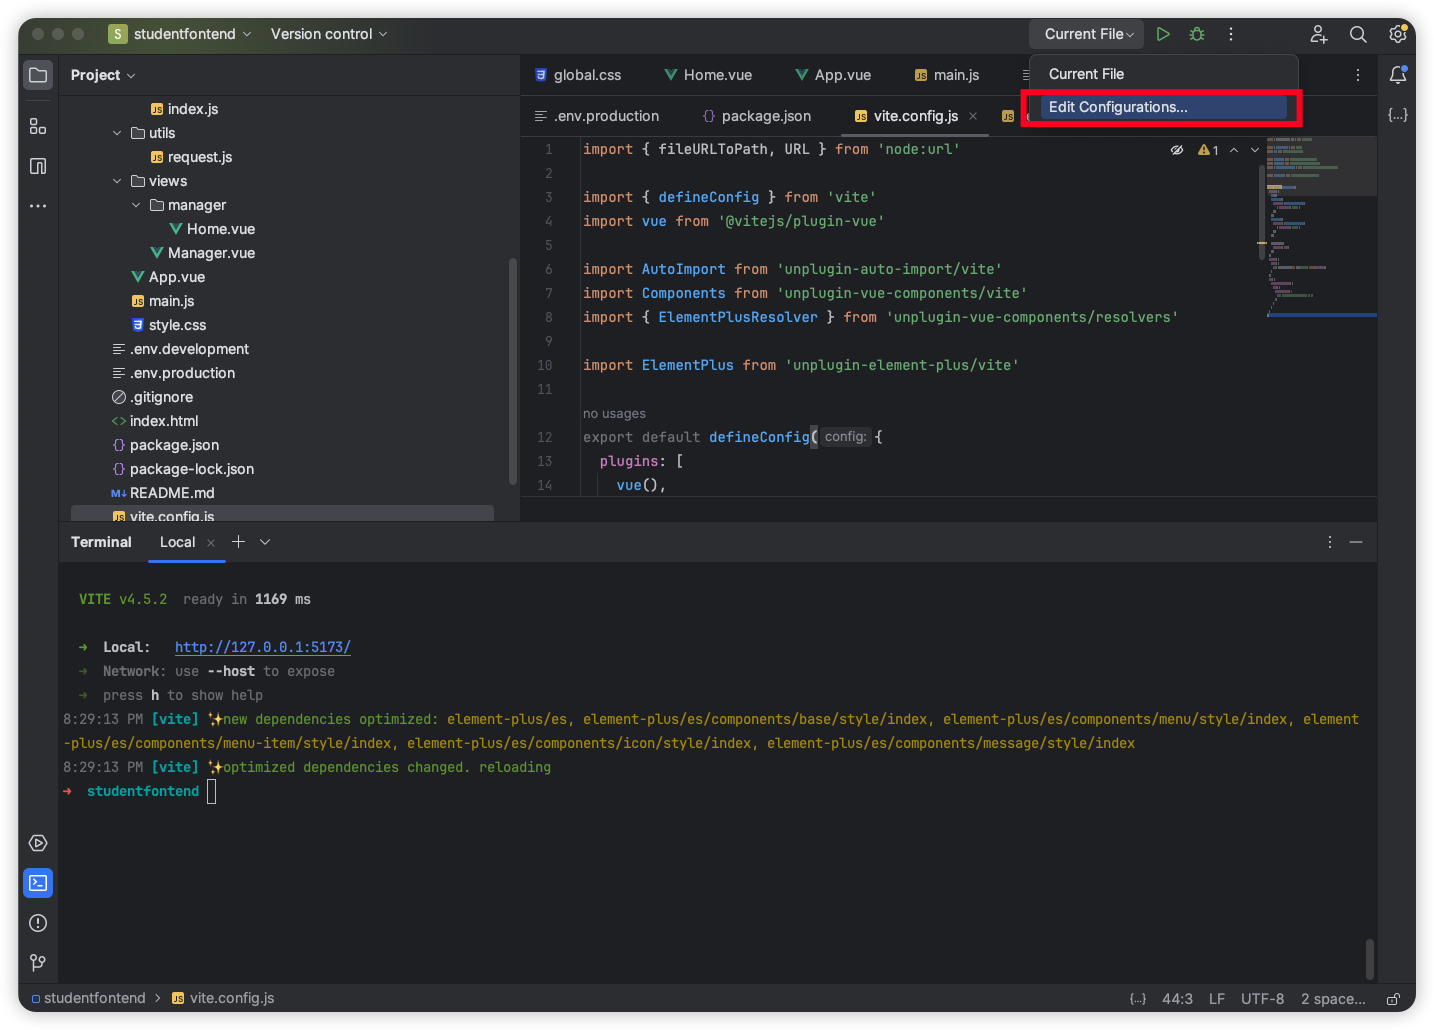
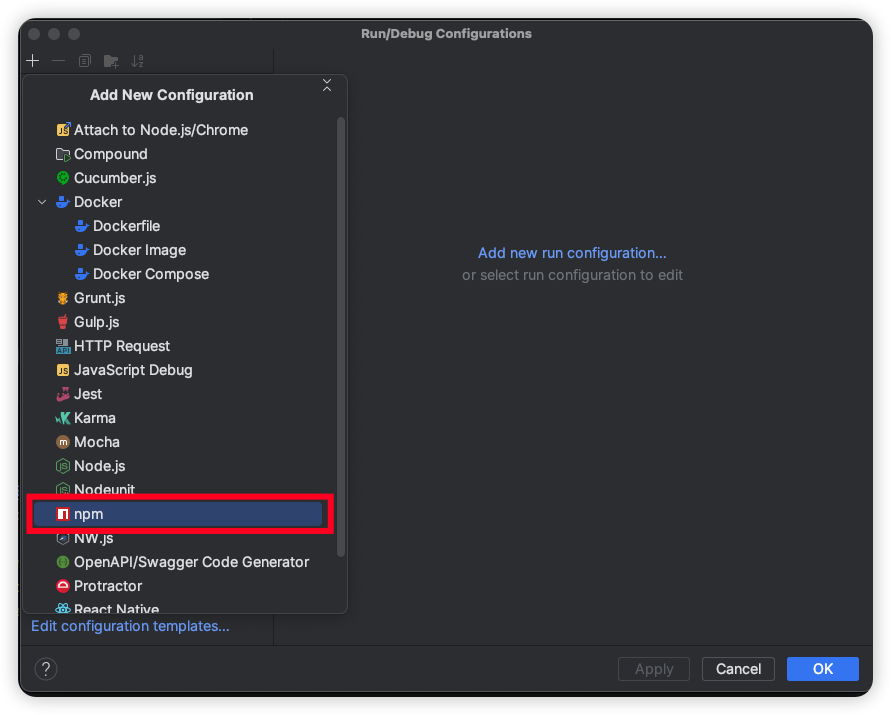
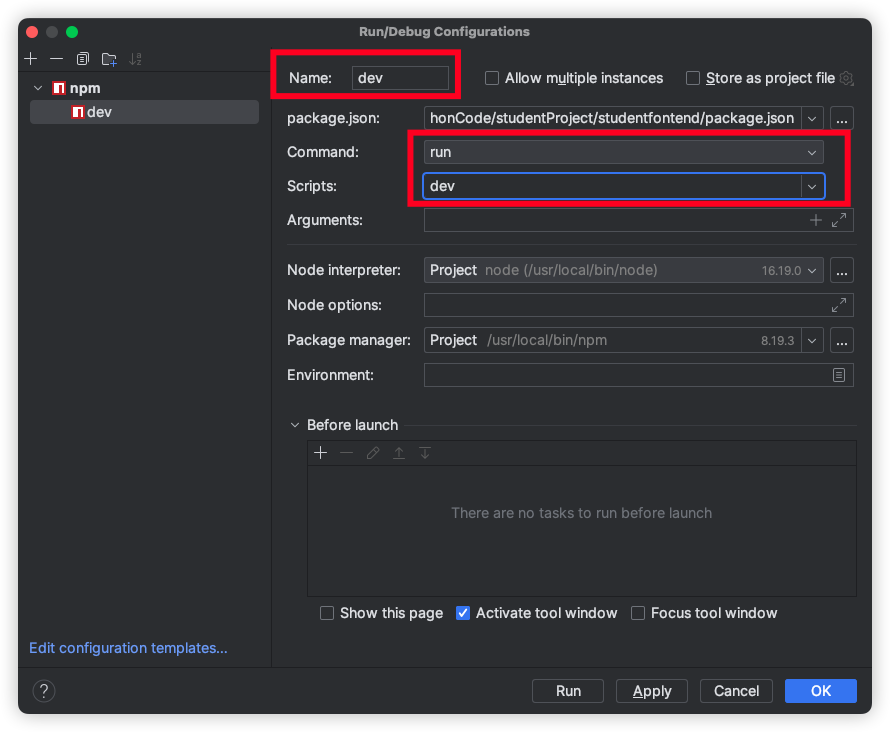
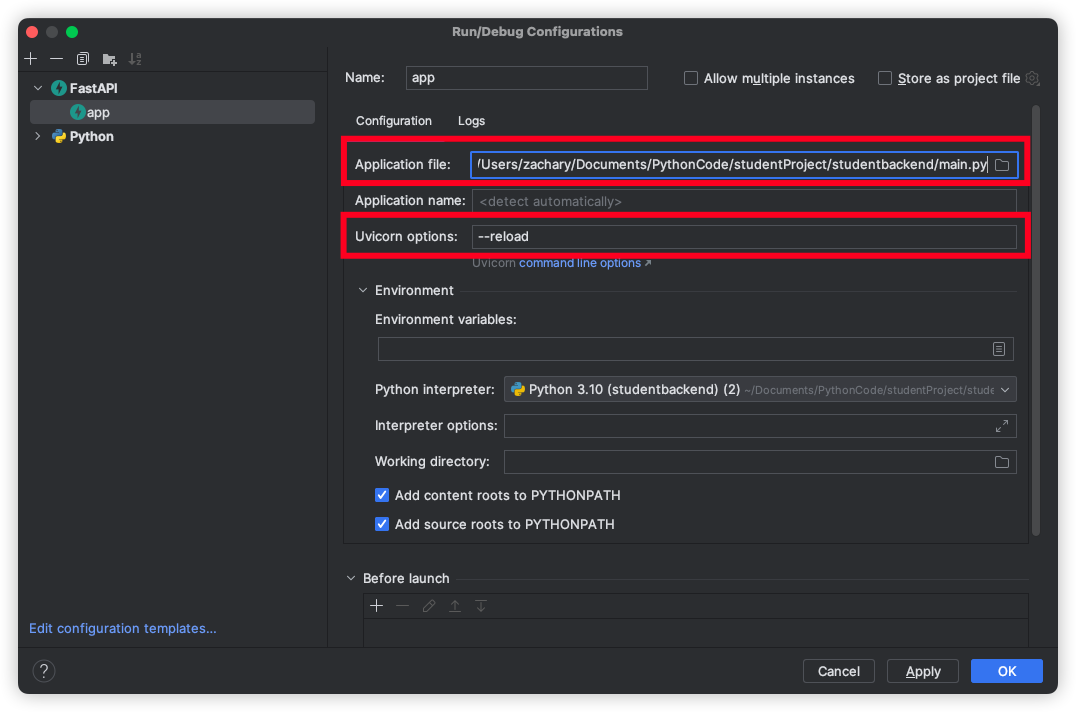
一键运行
通过配置一个启动项,便捷运行项目

后端 FastAPI
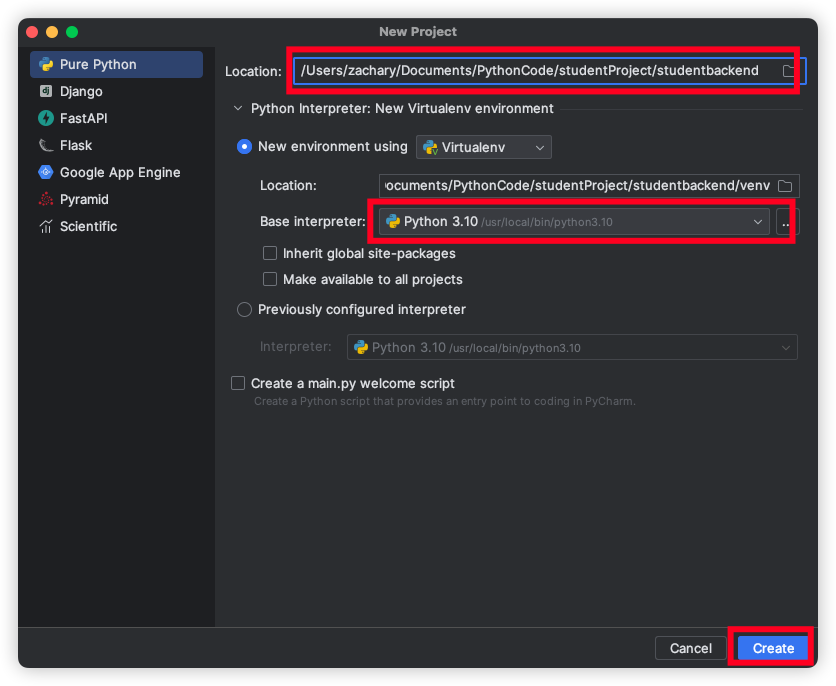
创建空项目
新建一个项目进入 FastAPI 的世界
先创建项目文件夹
1
2
3
4
5
6
7
8
| ➜ studentProject ll
total 0
drwxr-xr-x@ 16 zachary staff 512B 3 10 20:25 studentfontend
➜ studentProject mkdir studentbackend
➜ studentProject ll
total 0
drwxr-xr-x@ 2 zachary staff 64B 3 10 20:41 studentbackend
drwxr-xr-x@ 16 zachary staff 512B 3 10 20:25 studentfontend
|
然后使用 Pycharm 创建一个空项目

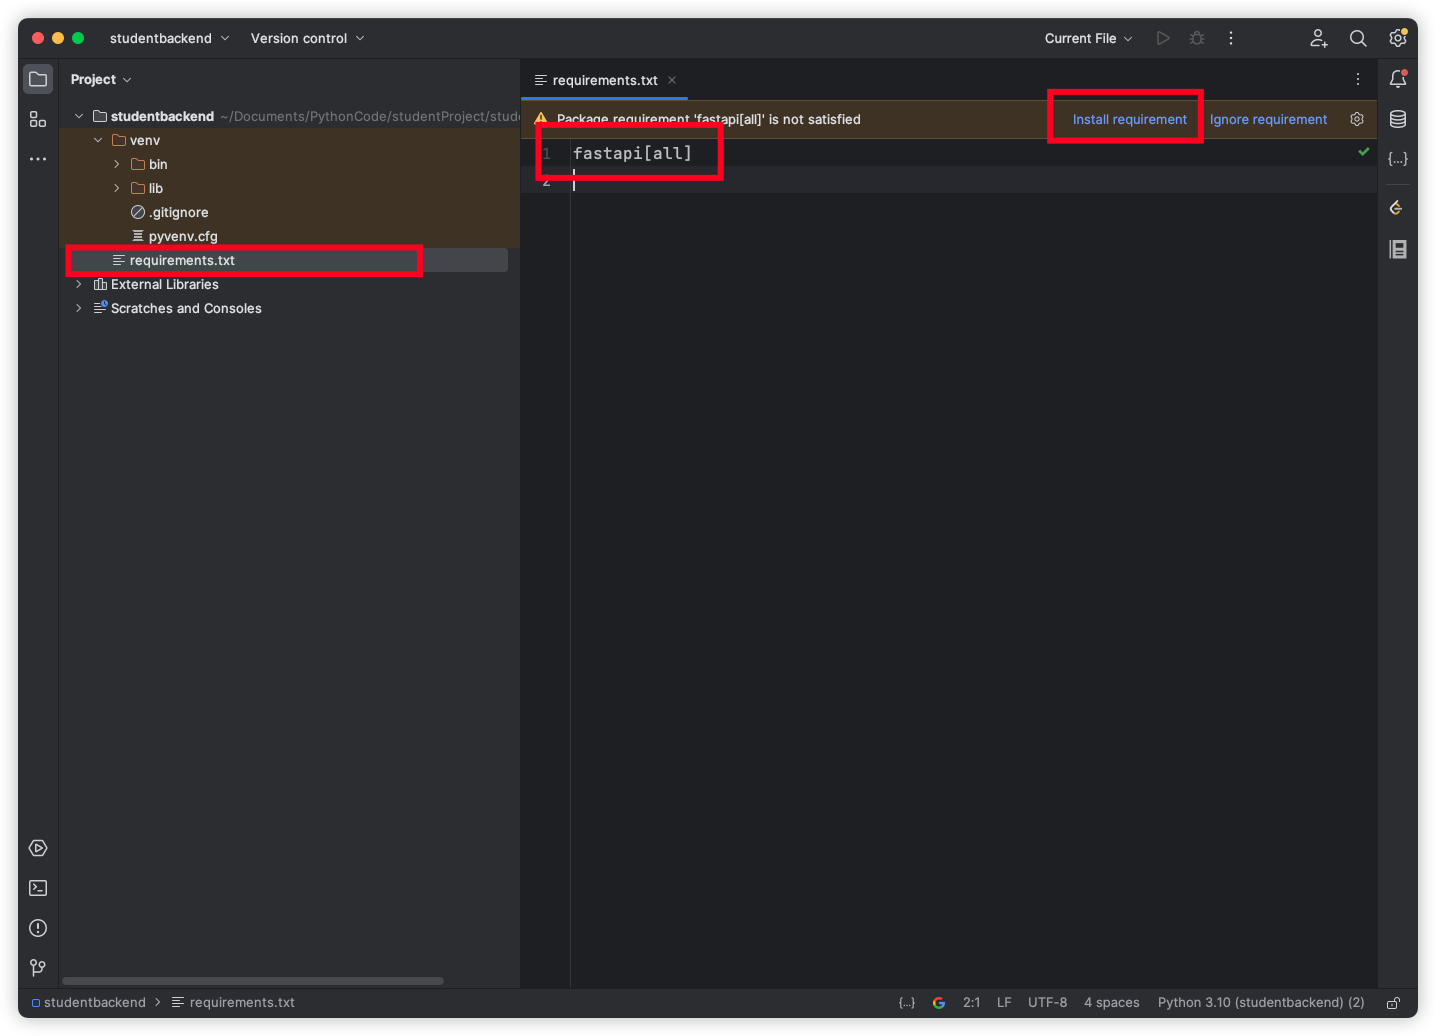
依赖包安装
需要安装一个 FastAPI 的依赖包
命令安装
pip install fastapi[all]
requirements.txt 安装
实现一个 api
创建
项目目录下创建一个main.py
1
2
3
4
5
6
7
8
9
10
11
|
from fastapi import FastAPI
app = FastAPI()
@app.get("/")
async def hello():
return {"message": "Hello World"}
|
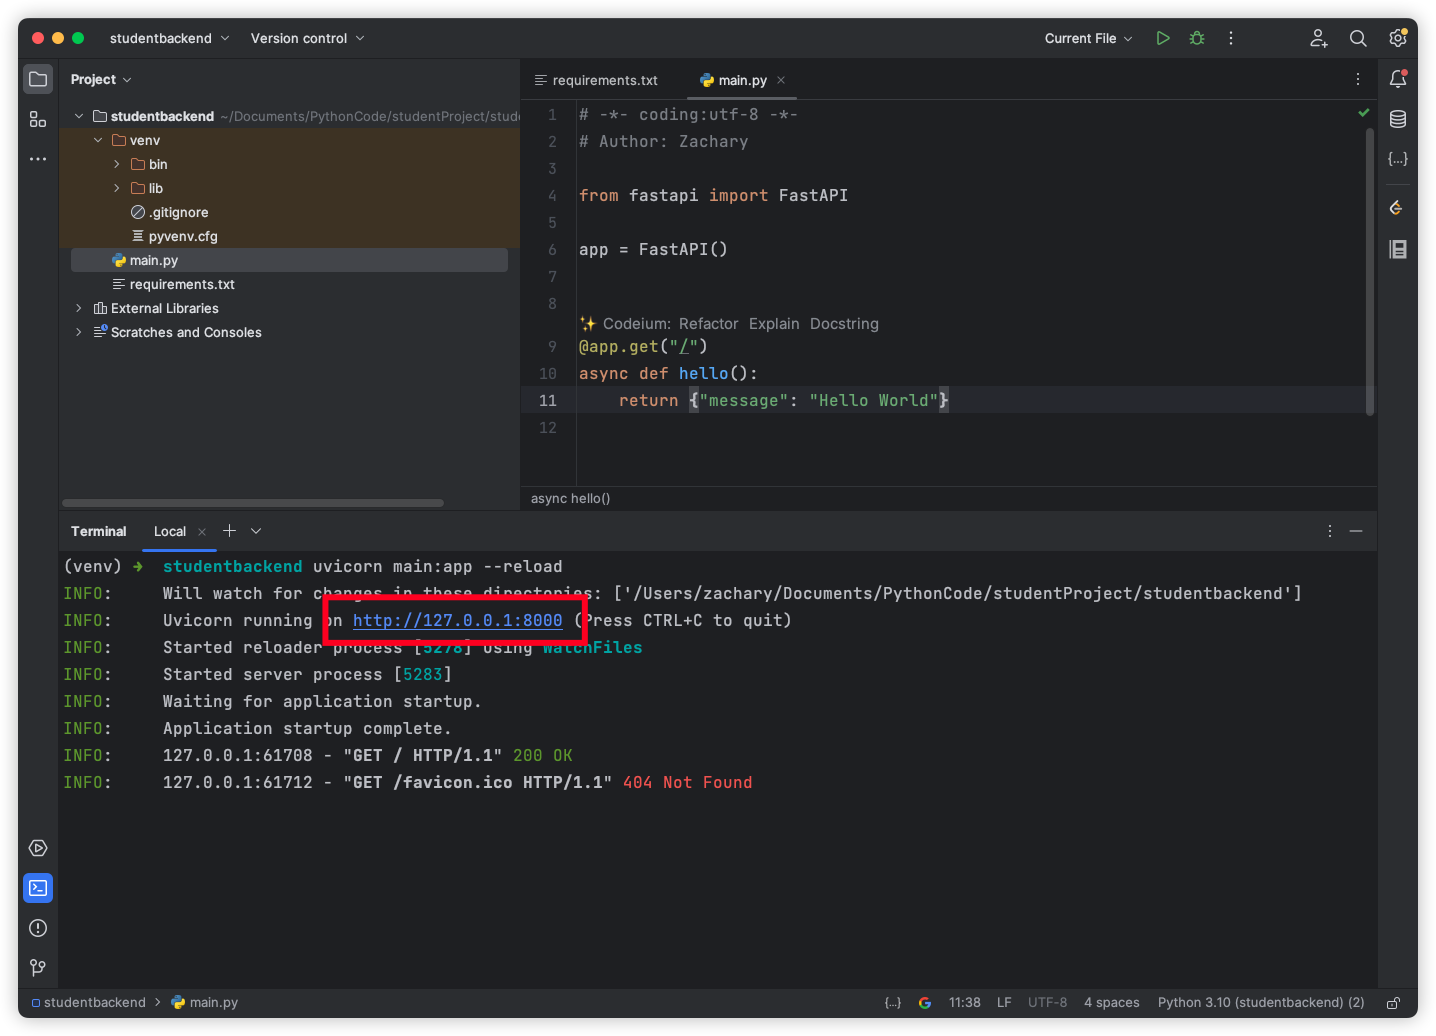
运行
需要使用 fastapi 提供的一个uvicornASGI 网关服务器来启动 api 服务
命令运行
uvicorn main:app --reload

一键运行
1
2
3
4
5
6
7
8
9
10
11
12
13
14
15
|
import uvicorn
from fastapi import FastAPI
app = FastAPI()
@app.get("/")
async def hello():
return {"message": "Hello World"}
if __name__ == "__main__":
uvicorn.run("main:app", reload=True)
|
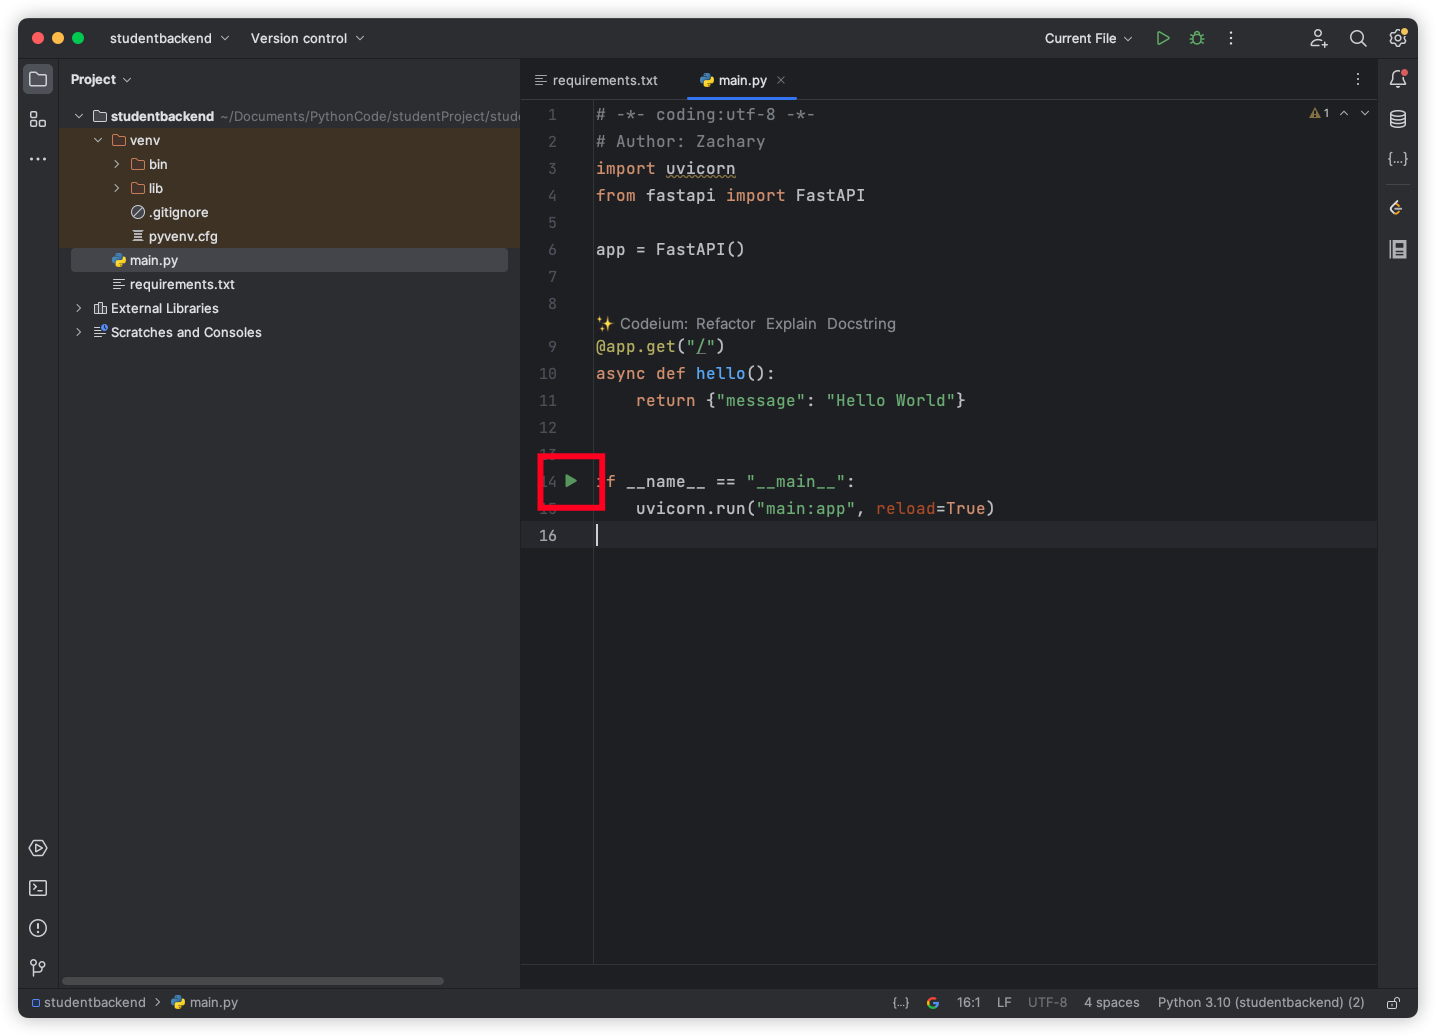
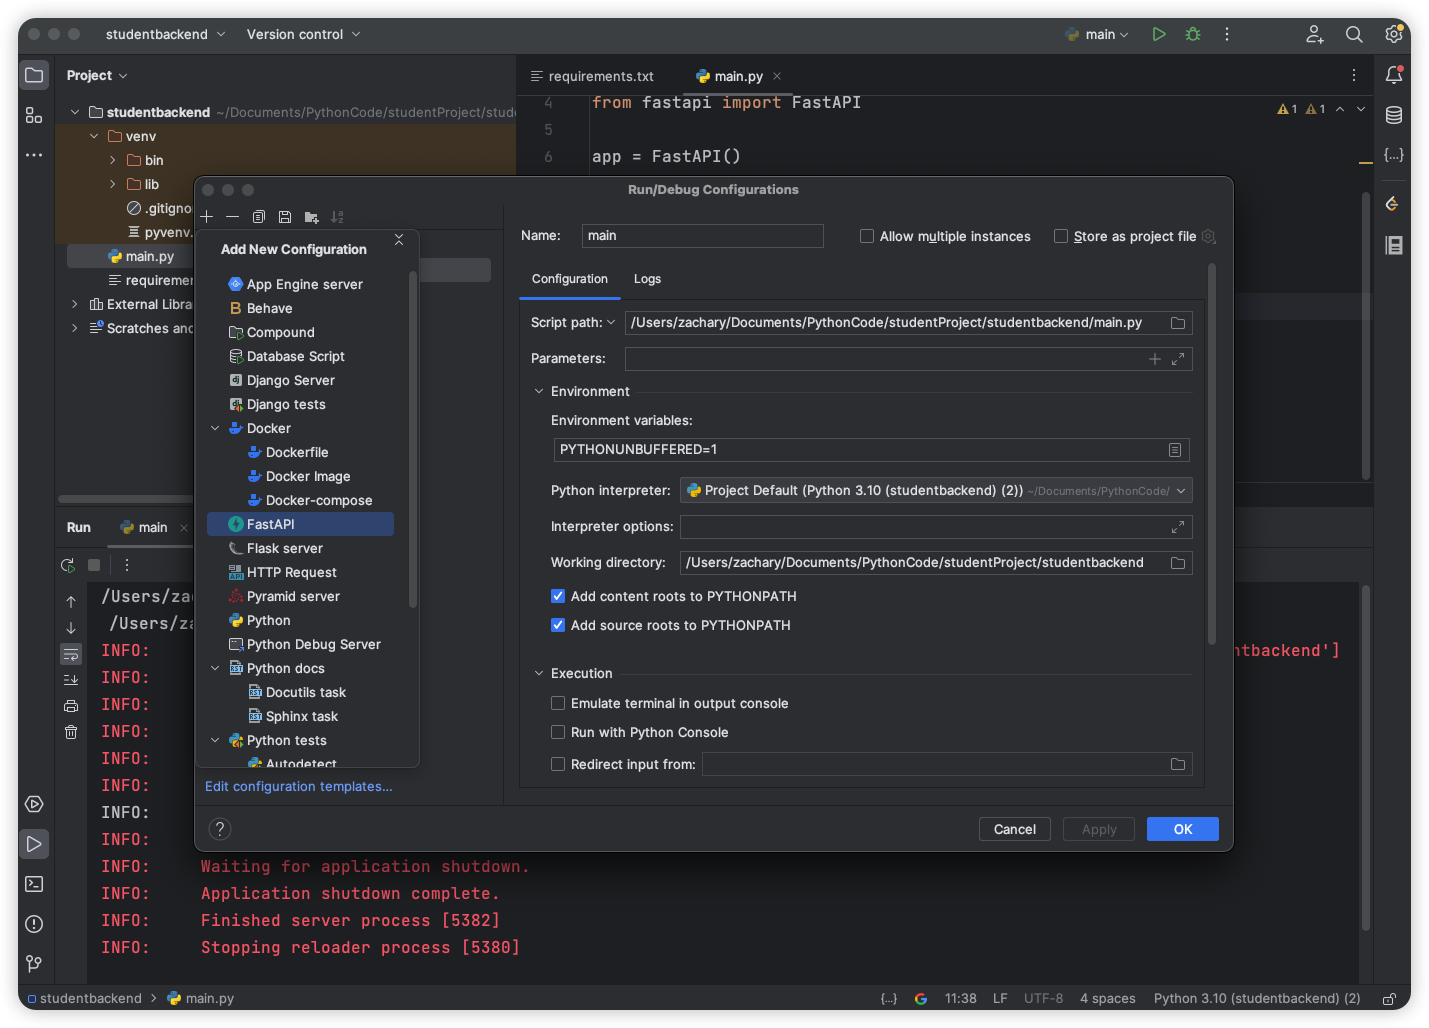
以上两种方式均可以实现,具体看个人习惯
项目整改
.env
这个文件用于存放环境变量,包括项目的运行 ip、端口号等,后面的数据库环境变量也在这里存放
1
2
| HOST = "localhost"
PORT = "9090"
|
common
在项目路径下创建一个/common的 package,用于实现公共类或者公共方法
环境变量配置文件
在/common包下创建一个config.py文件,实现对环境变量的获取
1
2
3
4
5
6
7
8
9
10
11
12
13
14
15
16
17
18
19
|
import os
from pathlib import Path
from dotenv import load_dotenv
class Config:
def __init__(self):
dotenv_path = Path(__file__).parent.parent / ".env"
load_dotenv(dotenv_path=dotenv_path)
self._env = dict(os.environ)
@property
def env(self):
return self._env
config = Config()
|
在/common包下创建一个constant.py文件,用于配置常量
1
2
3
4
5
6
7
|
from common.config import config
HOST = config.env.get("HOST")
PORT = config.env.get("PORT")
|
返回类 Result
实现一下 api 的通用返回类,在/common包下创建一个result.py
1
2
3
4
5
6
7
8
9
10
11
12
13
14
15
16
17
18
19
20
21
22
23
24
25
26
27
28
29
30
31
32
33
|
from pydantic import BaseModel
class ResultBase:
code: str
msg: str
data: dict
class ResultModel(BaseModel, ResultBase):
pass
class Result(ResultBase):
def __init__(self, code, msg, data):
self.code = code
self.msg = msg
self.data = data
@classmethod
def success(cls, data: object = None, code: str = "200", msg: str = "success"):
if not data:
data = {}
return cls(code, msg, data)
@classmethod
def error(cls, data: object = None, code: str = "500", msg: str = "error"):
if not data:
data = {}
return cls(code, msg, data)
|
exception
创建一个/exception的 package 用于自定义异常
api
创建一个/api的 package,用于创建后端的 API,实际就是 Controller 层
init.py
用于创建 FastAPI 应用初始化
1
2
3
4
5
6
|
from fastapi import FastAPI
app = FastAPI()
|
adminApi.py
创建一个 hello fastapi 接口测试一下项目
1
2
3
4
5
6
7
8
9
10
|
from api import app
from common.result import Result
@app.get("/")
async def hello():
return Result.success()
|
然后新增了一个 api 文件之后需要给 api 的init.py 说明一下新增了一个 api 文件
1
2
3
4
5
6
7
8
|
from fastapi import FastAPI
app = FastAPI()
from api import adminApi
|
service
创建一个/service的 package 用于实现 Service 层的业务代码
model
创建一个/model的 package 用于实现数据库的映射类
main
用于启动 FastAPI 的主入口程序
1
2
3
4
5
6
7
8
9
10
|
from api import app
import uvicorn
from common.constant import HOST, PORT
if __name__ == '__main__':
uvicorn.run("main:app", host=HOST, port=int(PORT), reload=True)
|
运行
直接运行 main.py 文件即可
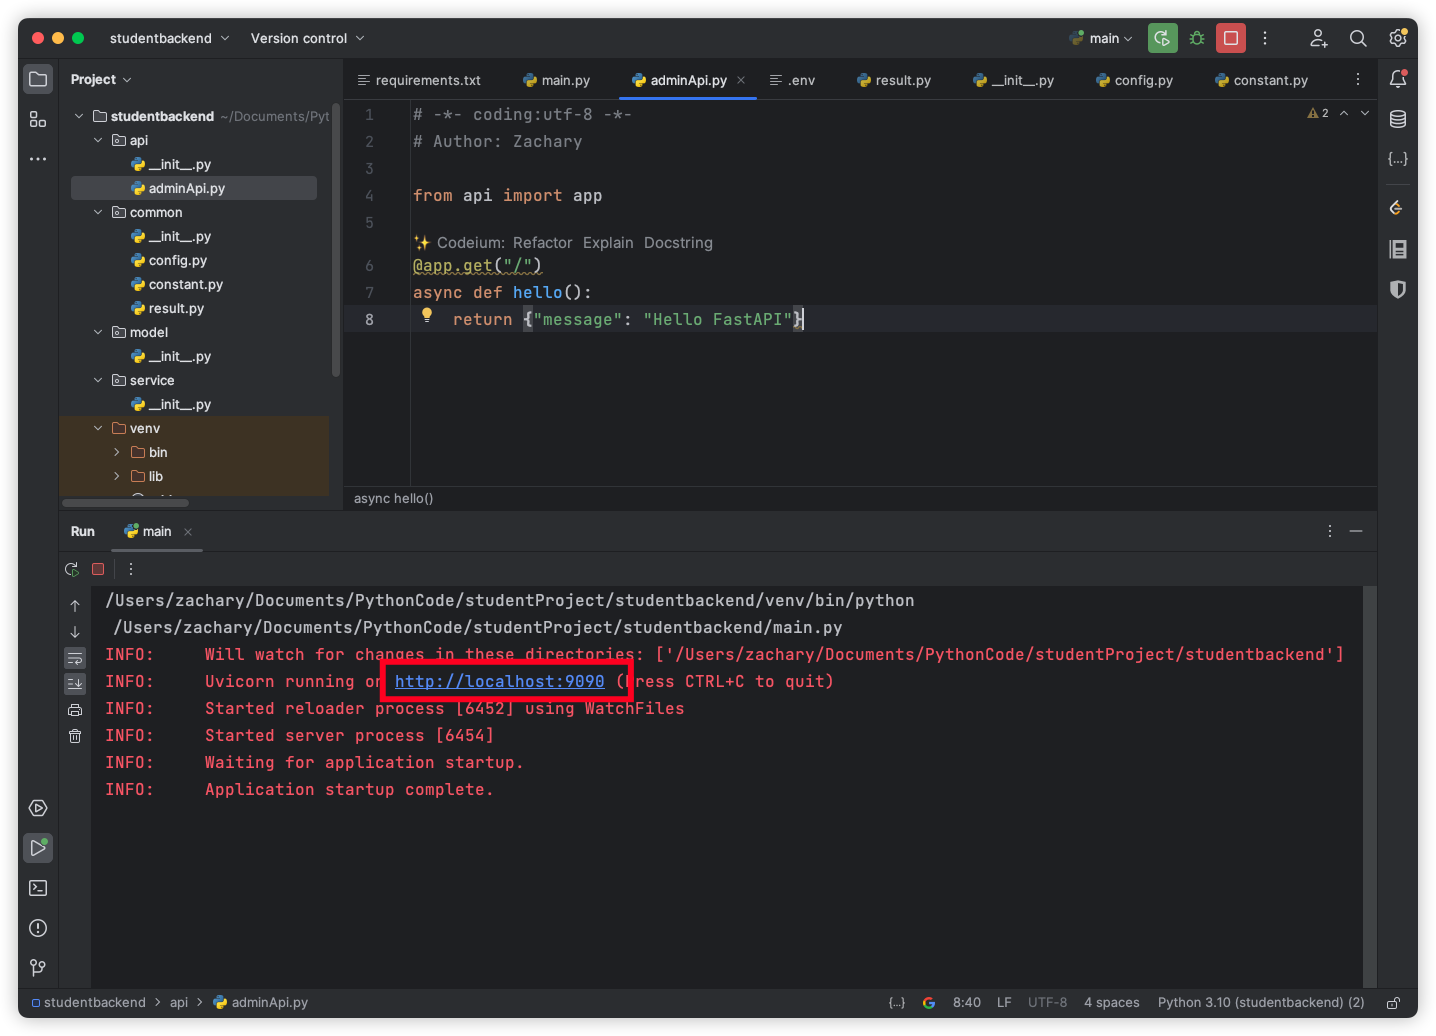
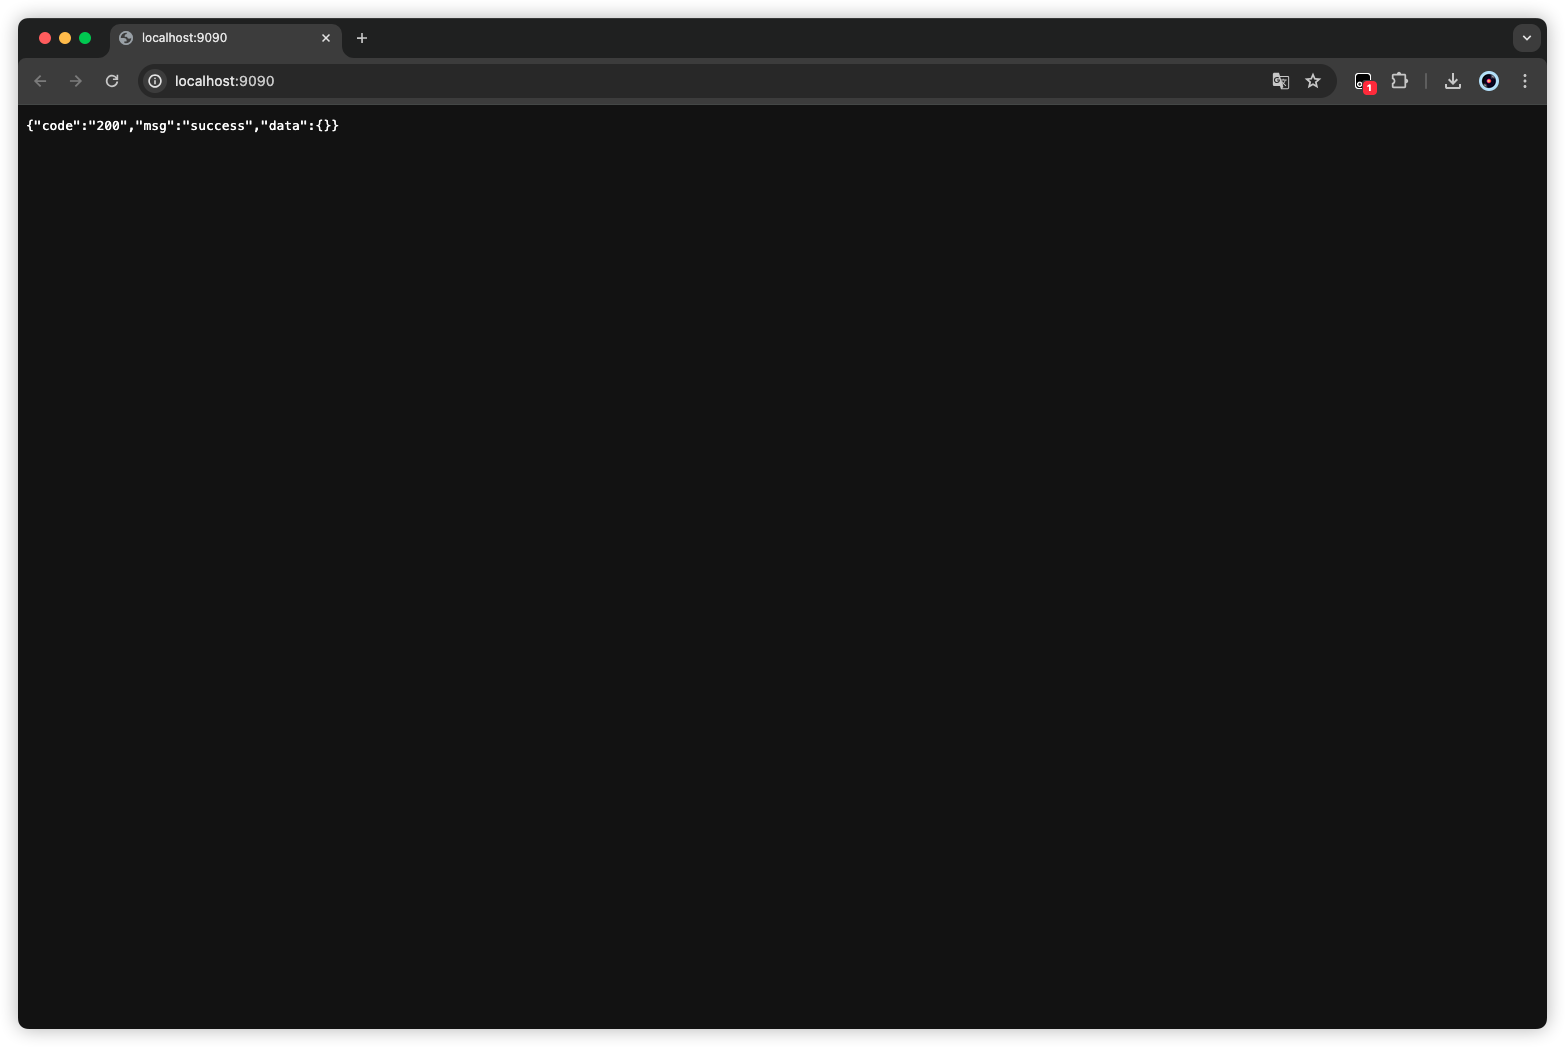
出现这个就是访问成功啦
至此,我们的前端后端项目就都初始化好了
更新: 2024-05-03 22:13:04
原文: https://www.yuque.com/zacharyblock/iacda/sengqtgphw3hc0hv